The Costume Journal is dedicated to my adoration of luscious silks, bundles of historical patterns, sewing projects, and every costumed event that has ever given me an excuse to make a new outfit from a by-gone era.
Sunday, October 31, 2004
My Husband the Vampire
Haven't had much time to sew lately...Polish class has been taking up lots of my time. However, I did want to show a picture of our halloween costume. Dave dressed up in my black cloak and had a killer new set of vampire teeth. I think I want to go get a pair too...don't they look good? I went as his victim...but of course didn't get a good picture. We had a great time. Happy Halloween!!!
Monday, October 18, 2004
Applying the Bertha
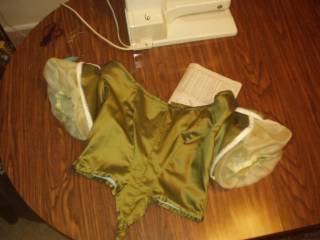
Tonight I pleated and assembled the bertha for the neckline of the bodice. I have a picture of it pinned onto the bodice (I was making sure the pleats were straight), but it's not actually attached to the bodice yet. I have to tack the pleats into place, apply bias tape along the bottom raw edge, add the white pearl trim to the bottom edge, and then finally attach it to the bodice. Still, we're definitely into the home stretch. Everything from here out is just finished up the details.
Sunday, October 17, 2004
Finished sleeves
I finished up the sleeves this weekend, so they are now entirely done and sewn into the bodice. The organza really does make beautiful puffed sleeves. I'm thinking about using my leftover organza to add a gather rim along the top edge of the bodice. I'm just not certain I have enough: I would love a very gathered, almost pleated, look.
The last steps on the bodice will be the bertha, and then finally adding a privacy panel in the back (it will give a bit more fudge room on the size when I'm lacing it up. After that, the bodice is 100% done.
Friday, October 15, 2004
The Scientific world of Sleeve "Poofs"
Alright! Now that my mother has unraveled the world of sewing with organza, the sleeves are moving forward. It takes a bit longer then sewing with another fabric because I have to take the time to go back over every seam and rip away the tissue paper I used as a stabilizer. Also, since Organza has a tendency to ravel, I'm using French seams. A french seam is a bit complicated to explain, but easy to do. It's basically a seam enclosed on itself to prevent raveling.
Wednesday, October 13, 2004
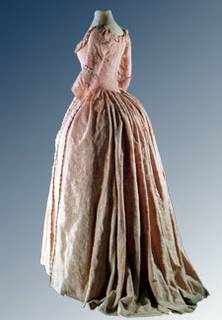
Robe Anglaise
AAaaaah! Someone save me from myself. If I had a million dollars...
JP Ryan, the master of 18th century clothing, has just come out with a new pattern! It's for a Robe Anglaise...a gown very popular toward the end of the 18th century. It has teeny tiny little cartridge pleats along the back, and instead of wearing side hoops, you wear a small bum roll. You can check out the pattern at this link:
http://www.jpryan.com/details/anglaise.html
I like view B. I haven't bought the pattern, and have no plans to in the near future (too many other things I would like to sew first), but ooooohh!! Maybe someday...
This is definitely on my wish list.
Monday, October 11, 2004
Bodice underway
Wow Sewing weekends are FUN!!
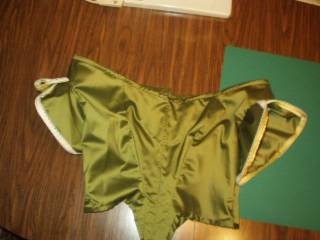
Before every one gets too impressed with the progress: I cheated here a bit. I actually started making the bodice months ago, and had it assembled for the most part (even the boning was already hand sewn in). What I did this weekend was hand stick on bias tape to finish the edges, and then I put on the sleeve caps.
The sleeves themselves are going to be poofy and made from silk organza. This is the first time I've worked with organza, and it's so fragile that I kept catching it in my sewing machine. Stumped, my mother came to the rescue and told me that I need to go get some tissue paper to place underneath and reinforce the organza while I sew. :) So, I'll need to hunt down some tissue paper that I can use (I suppose I could use pattern peices from sizes I'll never use).
Until next time, cheers!
Sunday, October 10, 2004
Look!! It's an ENORMOUS skirt!
Ladies and Gentlemen...we have a skirt!!!
Ok, it's not hemmed, and as you can see by the hand clutching the back, I haven't sewed on the hook and eyes yet, but it's a SKIRT. Don't worry about the lace that seems to have folded itself up on the side...it's there, matching the other overskirt panels. I just need to iron it back down. I was very proud of my cartridge pleats (they make that huge poof in the back), but my pictures came out kinda funny, so I'll save that for another day.
Friday, October 08, 2004
And Sew it Goes!
Now that I am free of the bias tape chains, I have made HUGE progress. I've applied all the bias tape that needed to be sewed to the skirt, and sewed together the pieces of the overskirt. I've draped the overskirt over the underskirt so that you can get an idea of what it will look like when it's finished.
The next step is a few pleats that need to be sewn into the overskirt, and then I'll attach the overskirt to the underskirt (this might SOUND easy, but it's going to involve lots of gather, knife pleating, and cartridge pleats). I'm excited/nervous about the cartridge pleats. They're teeny, and supposed take a lot of skill/patience.
Thursday, October 07, 2004
Hours and Hours later...
Ta DA!!!
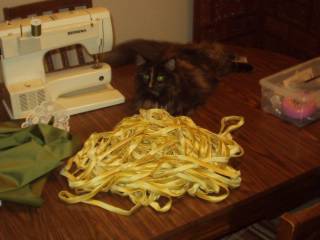
Hours of TV viewing later (with the ironing board set up in front of the sofa) I have yards and yards of luscious yellow satin bias tape. And yes, the cat really did HAVE to be in the picture. I'm telling you, the moment she claws at the satin, I'm gonna be one step closer to my Tudor gown with fur sleeves. (but seriously, she really IS cute, isn't she?).
Tomorrow I'm running to the fabric store to get yellow thread, and then I'll start sewing on the bias tape to the skirt pieces. Gotta love Friday's!
Tuesday, October 05, 2004
The Bias Tape Blues
Yard and Yards complete...
Only a few more dozen to go.
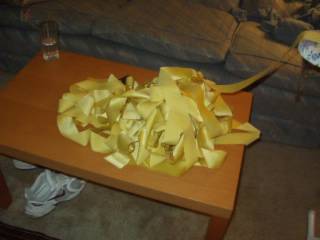
Okay, you want to talk about a project that would drive you nuts?? Well, after very carefully marking out the satin on the bias so I could cut it and turn it into bias tape, I messed something up because the silly lines didn't match up at all! So instead, I grabbed the pattern 'guide' piece, and just kept using it over and over again to cut the bias tape without the markings. Took forever, but voila! Hopefully some 33 yards of bias tape.
Hard part done! Now all I have to do is Iron it all into the correct shape (the above picture is what it will look like when its done). I'm very happy with the way this is turning out, and I think the satin and taffeta (and even the color combo) might turn out much nicer then I had originally thought.
Until next time, I remain ever your seamstress, buried under mountains of Satin. There are worse ways to go!
Monday, October 04, 2004
Ball Gown: Overskirt
It's been a while since my last post...'real' life has been getting in the way of sewing.
Here are the peices of the overskirt with the lace attached: the light shows the true color of the taffeta. The overskirt is taking a while because I had to hem part of the skirt peices, iron up the rest, and then attach the lace to the edges.
I've marked off the fabric for the bias tape, and my next project is sewing it together, and then cutting the tube into 33 yards of bias tape. It'll take forever, but there's nothing more I can do on the dress until that's done. In case I haven't mentioned this before, this dress is by far the most complicated and time consuming project I've ever undertaken. I would have thought that a fancy set of 18th century stays would have required more skill, but I'm am being proven wrong. Still, I love working with this gorgeous fabric, and the gown is going to be stunning when it's completed!!! (I also have a sneaky suspicion that it's going to take up more then its fair share of a room)