Wednesday, June 15, 2011

Whatever shall I wear?

While I have been slowly chugging away on my sewing projects, I have admitted defeat on my Under The Redcoat project. I just don't have time to get it finished. I might get my stays done in time, but there's no way I can get a dress patterned, sewn, and trimmed (with matching hat) in 1.5 weeks. I need to win the lottery so I can devote myself full time to my costumes! :)
My half-boned stays are coming along quite nicely. I have sewn in the lining (I'm loving the blue gingham!!) and gotten the edges partially bound.The top edge is complete, but as these pins prove, I'm still working on finishing up the bottom half. It is, of course, the more difficult half thanks to all the tabs.I did get the eyelets all nicely hand-bound. I found some beautiful silk embroidery floss when I was in Charlottesville a few weeks ago and used it. I still prefer silk buttonhole twist, but since that's not always available the embroidery thread was a nice substitute.Another reason progress has slowed down a bit on my projects is because I'm working on a commission. It's a fully boned pair of 18th century stays. I'll post pictures once I'm finished, but here's a sneak peak. Isn't the color fabulous? I love the gold silk.
I ordered 50 yards of plastic boning for the commission stays. I was really worried that I hadn't ordered enough...but here's what was left in the end. Talk about ordering just the right amount!

Thursday, June 02, 2011

Bound Eyelets

I hate doing posts without any photos, but I thought I'd mention that I've finished hand-binding the eyelets on my stays. I managed to find some silk embroidery thread in Charlottesville and used it to bind the eyelets. They turned out very nicely, but since it's white on white I had a really hard time taking a photo of the eyelets.

The lining is pinned down, and tonight I'll start binding the edges. We're in the homestretch.

In other news...I don't think I have a prayer of getting any of the outfits that I'd wanted to complete for Under the Redcoat and Gettysburg. I'll have this weekend to work on them, but since I don't want to rush and mess up, I'd rather take my time and wear them later.

Monday, May 30, 2011

18 Century Stays Progress

I'm working on a commission (also an 18th century pair of stays...I'll post photos when I'm done), so progress on my own half-boned stays has been slightly slower than normal. However, I got all the boning channels sewn in... ...added the boning (I'm using German Plastic boning), tacked down the inner seams... ...and assembled the lining. All that remains is to hand bind the eyelets raw edges (this is most time and labor intense part of 18th century stays for me).

Don't you love the lining I picked out?! Burnley & Trowbridge had a lovely gingham/checked blue linen. I couldn't stick with plain white both inside and out (boring!), and since plaid linings are period, I decided to go for it.

Wednesday, May 25, 2011

Late 18th Century Stays

So, like much of my costume wardrobe, my 18th century stays aren't fitting so well these days, so I decided to make a new pair. I've never tried making a later 18th century pair of stays, so I thought I'd try out JP Ryan's new half-boned stays' pattern (pictured above).

Unlike her fully boned stays, I've experienced some fitting issues with this pattern. I usually really like JP Ryan's patterns, but I've had some frustrations with this pattern. It might have actually been the same amount of work to scale up a pattern from one of my costume books. I had to redraft the pattern, shortening it by 2.5 inches, adding 4 inches in the bust, and shrinking the waist by 2 inches. I had to make two mock-ups - my edits made the pattern the correct proportions, but it was too large. Here's my first mock-up (clearly too big)
I forget sometimes that I'm very squishy. Here's the second mock-up...apparently still too big, even if my dress dummy fooled me:Luckily, I didn't want to make these stays meet in the back as the pattern is designed to do, so I just took the excess out of the final back pattern piece and was back in business.
Now I have to redraw all of the boning lines. This was painstaking work that took over an hour to get right, so I'm slightly frustrated. I'm also thinking the straps might be too short, but that's an easy fix and I have enough left-over fabric. You can barely make out the penciled in boning lines in the photo below:

Saturday, May 21, 2011

Civil War Cage Crinoline

While I already own a hoopskirt, it's made as a petticoat with sewn-in channels. It's very similar to this cage crinoline at the MET. All the fabric (in addition to the steel) is surprisingly heavy. It's from the popular Simplicity pattern, but it's too long and is constantly scraping the ground. I could fix that, but it's also very large and not really designed for day-wear. I decided I'd like a new set of hoops, and wanted to try making a cage crinoline, like this one at the Victoria & Albert museum:
I purchased a fairly straight forward kit from Originals By Kay, and was able to put it together in an afternoon with my husband's help (I really don't like having to use the bolt cutters to cut the hoop wire). My dress dummy was a lot of help. It seems like period crinolines had many more hoops than modern reproductions, but our hoop steel is very different than what they had available during the civil war.The hoops are 108 inches in circumference, and are not an exact bell shape since they are ever-so-slightly larger in the back. That way my skirts will be more voluminous in the back. I would definitely recommend Kay's kit for convenience and ease of construction. There wasn't enough tape in the kit for me to make my waistband, but I have enough ribbon/tape lying around that it wasn't a problem. I admit I'm curious about the Truly Victorian hoop pattern since it includes a bag hem (you're less likely to put a foot through a hoop). Has anyone tried out the two different hoop styles?

I have a petticoat that will work with these hoops, though I know I should really make a new pair that:

A) Fits better
B) Has a flounce
C) Is neither too short nor too long

Thursday, May 19, 2011

Completed Civil War Corset

Here's a finished shot of me in my new Civil War corset. It'll do the job so I can move forward with my Gettysburg dress, but it's a bit too small...I can't even post the back shot because I'm a bit embarrassed by the fit. In hindsight, I definitely should size up Simplicity 7215. It was my favorite corset, and I hope to fit back into it someday.

Wednesday, April 20, 2011

18th Century Wigs

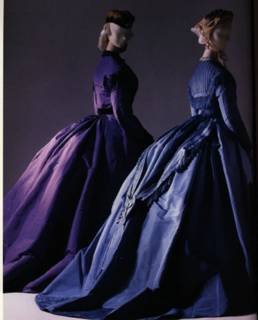
Wigs (or 18th century hair, if you're blessed with hair long enough) has always fascinated me. I remember reading about La Belle Poule (the ship-in-the-hair style) when I was a kid and marveling at how silly it was. Now, of course, I'm obsessed enough with the 18th century that I'd actually give it a try. :) I can't remember where I came across this 18th century illustration of hair styles, but I love that each one has its own name:

I was thrilled to make it to the Wig Maker during my latest trip to Williamsburg. Check out their new Facebook page. They're not always open on the weekend when I tend to visit, so it was a treat. The wig maker was restyling the governor's wife's wig. It still blows my mind to think that ladies would shave their heads if they wanted to wear a wig. I wonder how common ladies wigs were vs. getting your own hair styled. Does anyone know?


There were all sorts of new wigs on display. In the past, it seems like the store generally had men's wigs on display, but this time there were tons of ladies' wigs. This one is actually a man's wig (can you imagine what a dandy a guy would have to be to wear one of these?). It makes me think of the hairstylist Leonard in Sophia Coppola's "Marie Antoinette."

I LOVE this wig, because it's my hair color and has peacock feathers. I have no idea what's up with the scissors. I think maybe they were on the shelf in the background (not IN the wig), but I didn't notice it when I took the photo.

I love the one on the left. The pretty pin curls toward the top are my favorite.


And here's my favorite. What's not to love? It's the powdery ideal of the 1770's and doesn't look anything like the horrid white wigs costume shops sell (I do realize comparing the quality between costume wigs and the Williamsburg Wig Maker is like comparing a Fiat to a Ferrari, but that's what came to mind).
Check out all the little side curls piled one on top of the other! That, combined with the twisted chignon and feathers, it's just to die for!! I want one. I'm not very talented when it comes to hairstyling, or I'd have already bought a wig and tried my own hand at creating an 18th century poof. Kendra has a great tutorial on how to style a 1770's wig, and Abby of "Stay-ing Alive" has a great 1780's hedgehog tutorial if you are more talented at hairstyling.

I'm hoping that there will be a wig workshop in my future or that I cajole my way onto the wigmaker's wait list.

Monday, April 18, 2011

18th Century Calash Bonnet

Today I'm going to review my Calash bonnet project from the Burnley & Trowbridge workshop. These somewhat goofy looking bonnets served a fairly practical purpose - to protect a lady's hairstyle from the elements. I found a few period illustrations of a Calash showing enormous examples, most likely from the 1770's:

Here a smaller portrayal of a Calash bonnet, also from the 1770's (the portrait is titled "Miss Crewe"):
This is most likely a satire portrayal of a calash, but I like that it's a more rounded shape consistent with the hairstyles of the 1780s. It also shows off the lead string or ribbon that's sewn onto the calash. The bonnets are very lightweight, and a lady could hold onto the ribbon to keep the calash from blowing off. Janea told us that contemporary lady magazines frowned upon young ladies who snapped their calash ribbons in order to be noticed by passing gentlemen. Shocking!
Here's Emma modeling the milliner shop's calash that's based off the Spruce Sportsman. The reeds in that sucker are 40 inches long!

Here's my calash in progress. I chose a green silk with pink lining, similar to this calash at the MET. I worked all the channels by hand with silk thread. This is one of the few projects I've made that is 100% hand-sewn.Here's the finished product from the side:Here's a nice shot of the contrasting lining. I can't find the reference, but apparently this color combination was compared to a blushing rose. Although they appear slightly cumbersome to the modern eye, apparently calashes could be very romantic (or coquetish...if you go around snapping your ribbons) accessories.And here's the back, finished off with a small ruffle and bow.And here I am with the obligatory mirror shot. Don't I look period correct with my shorn hair, glasses, and red t-shirt? I just didn't have the energy to dig out my wig. But, you can see that I have plenty of room for a towering coiffure.

Wednesday, April 13, 2011

18th Century Mitts

Next up from my weekend in Williamsburg: mitts!! I've always wanted a very pretty pair of mitts, but I could only find wool/linen mitts that were cut too big or too small. This way, I got to make a fancy set of mitts fit to me.
Here's an example of 18th century mitts (the painting is called the Lady with the Veil). I love the raspberry changeable silk with the blue lining. Isn't that a fantastic color combination?! It wouldn't work with any of my dresses, so I decided to go with something else. There's something very coquettish, though, about having the tip of the mitt flipped back to reveal the lining.Here was the inspiration for my project - a pair of silk mitts from Colonial Williamsburg's collection. It helped that there was a reproduction of these available to look at during the workshop. I made a simpler version of this pair: I ditched the inner arm cut-out, green accents instead of blue, no leather lining, and less embroidery because I just don't have the patience.Here I am getting the muslin for my mitt pattern fitted. There definitely seemed to be an art in getting things to fit properly. Sarah, from the Mantua Maker shop, was a pro and tugging, tucking, and otherwise getting the uncooperative fabric to conform to my hand. Here's a shot of the finished product (ignore the non-period fingernails). The fabric is a duchess silk satin. I saw it and immediately fell in love (I was actually holding another bolt of fabric for my mitts when I spotted this fabric underneath a pile on the fabric table). Little did a know that there's a story behind the fabric: the satin was a remnant from Vera Wang! Yes folks, I made a pair of mitts out of the fabric Vera Wang uses in her $5,000-and-up wedding dresses. Pretty neat, huh? Here's a shot with the tips flipped back to show off the sea-green silk taffeta lining.
I decided to finish the edge of my mitts the same in the same manner as my inspiration gloves: a herringbone embroidery stitch up the side in silk embroidery thread.
This is what it looks like when I'm wearing it. The camera didn't do a great job of capturing the stitches, but you get the gist.

Friday, April 08, 2011

18th Century Muffs

Ah...muffs. What an elegant accessory! I can't imagine why they fell out of style. Especially the very clever 19th century muffs that had hidden pockets inside. Apparently 18th century muffs did not commonly have pockets. Fur and feathers seem to be most commonly depicted in 18th century fashion plates. The period examples I have found, however, are not dominated by fur/feathers (though the MET has one in its collection). Maybe they were just considered more fashionable/desirable but were more expensive? Anyone know? Here's a 1770's French fashion plate from Galleries des Modes et Costumes Francais showing what appears to be a fur muff:


The Museum of Fine Arts in Boston has several muffs in its collection, including some very pretty silk muffs. The one below features gorgeous silk satin and a portrait medallion. Portrait medallions seem to have been pretty popular decorations for muffs, but since I don't want to mess around with printing out an image with my printer on silk, I decided to forgo this option.

I really liked this example as well. It features some gorgeous detail work, including fly fringe. Having learned how to make fly fringe during the last class I took with Burnley & Trowbridge, I can tell you that's a big time investment! I think I managed about 6 inches of fringe after four hours of labor.
I have Emma from the Mantua Maker's shop to thank for helping choose this amazing color combination. I had already decided to go with green silk for my muff because I thought it would go nicely with my pink Robe Francaise. When I couldn't decide on how to trim the muff, Emma steered me towards the gorgeous peach silk ribbon. One of the great things about the muff is that it's essentially a pillow cover. I made a linen tube and filled it with wool batting for the inside. The silk cover slides on and off the pillow, so I can make as many silk covers as I want! That's nice since it seems like I'm always new gown in completely different colors.Here's the finished product! Doesn't it make you think of candy? A salt water taffy, or maybe French Macaroons? I definitely fell victim to the color palate from Sophia Coppola's "Marie Antoinette," but who cares?!Here are all the lovely muffs that were made during the Burnley & Trowbridge workshop.

Wednesday, April 06, 2011

18th Century Fashion Accessories

It's spring, which must mean it's time for another fabulous Burnley & Trowbridge workshop! I really missed attending these workshops: while I was in Colorado last year I missed out on the polonaise workshop I'd been begging and pleading for.

This workshop focused on "Calashes, Bonnets, Mitts & Lovely Little Bags," or the accessories of the late 18th & Early 19th Century. The accessories can really make the outfit and contribute to the authenticity of a look. Feast your eyes on all the eye candy accessories they brought with them to display at the workshop:Over the course of three days the ladies from the Margaret Hunter Mantua shop in Colonial Williamsburg and Angela of Burnley & Trowbridge taught us how to make little inked bags, calash bonnets, muffs, and mitts. No visit to Williamsburg is complete without a visit to the Mantua shop, and this time I was thrilled to see a little miniature doll-sized store on display. Look at the wee little stays, hoops, and pocket!!

I'm going to post separately about each project, starting here with the inked bags. Apparently these friendship bags were common in the early 19th century. The PowerPoint that Burnley & Trowbridge showed us had lots of period examples of these bags, but unfortunately I can't find any images online. You gave these bags to friends and loved ones as little tokens. There were even some really neat examples of these bags made in pink with abolitionist messages printed on them.
Black ink was applied directly to the cotton in order to mimic embroidery. We used a light box to trace out the images we liked. Here's the front of my bag: And the back of my bag which is a Jane Austin quote about a friendship bag: Unfortunately my back started hurting pretty quickly bending over the light box, or I might have made a more elaborate bag. Still, I was very pleased with how it turned out. I especially like the fringed edge, the hand braided decorative cording that I made, and the handmade tassels...which I just realized are not in my photograph. Oh well.