Showing posts with label Halloween Fun. Show all posts

Sunday, October 04, 2009

Girl's Revolutionary Dress

This project is finished. Here's the final photo:
The front panel is a pink satin. I used net trim that I found in the .97 cent bin (wohoo!), roccoco trim on top of that, and net lace for the sleeves. With the exception of a little trouble with the zipper, no problems, and the dress went together like a dream.

I'm also announcing that I'm assembling a gallery of my completed projects so they'll be all together in one place.

Sunday, September 13, 2009

A Little Girl's Dress Up Gown

I've begun a small sewing project while staying at my parents' house. I learned that my flower girl has cherished her flower girl dress over these last five years, and was so touched I decided that she needed another special dress that will fit her now. We went through the pattern catalogs together, and she picked out this 18th century girl's McCalls' pattern (M5414):
The dress is fairly straight forward to make. I'm using some of my fabric stash for this outfit:I've cut out all of the patterned cotton shown on top, but when it got time to cut out the faille I just couldn't do it. I bought these two as a pair, intending the faille to be an 18th century petticoat, and the cotton to be an 18th century jacket (obviously not very period). The faille, even though it's only poly, cost quite a bit is very nice quality. It's going back into the stash, and I'm going to the fabric store tomorrow. I think a pink poly satin will do the job nicely. I also need to pick up some interfacing and a zipper. This will be very cute when finished.

Sunday, October 05, 2008

Yes, I'm Still here, and Still Sewing

Just a quick update to let you know that I AM still sewing, but preparations for my sister's wedding have slowed my progress somewhat, and I had to get my sewing machine serviced which put me out of commission for two weeks. The day I got my sewing machine back I finished Caly's Halloween costume (yes, it is sickeningly adorable when she puts it on, and no, Caly does not like wearing it). No pictures of her in the outfit until Halloween though!
I am currently working on a new set of 18th century side hoops. As I mentioned in my last post, the reeds in my panniers broke. Rather than repair the old set, I'm remaking them out of a stronger and period accurate cotton ticking. I have the fabric cut out, and all the pattern markings have been transferred. I just need to sew them up and order hoop steel tips. I'm using the same pattern since I really do like the shape they give my dresses. I highly recommend JP Ryan's pattern.

Saturday, November 04, 2006

Halloween: The Main Event

lIf you want to read about our Halloween events, please visit the Dave and Melissa blog. I'm mostly just posting pictures of all the little ghouls in their Halloween finery made by yours truly. little Sophie dressed as a Pea in the Pod...her costume was flannel wool, but she's been bundled up again...so she's the pink pea-in-the-pod. She looks pretty comfortable, wouldn't you say?

Nadia made a great belly dancer! She looks like she'll be able to grow into this costume over the next year as well.
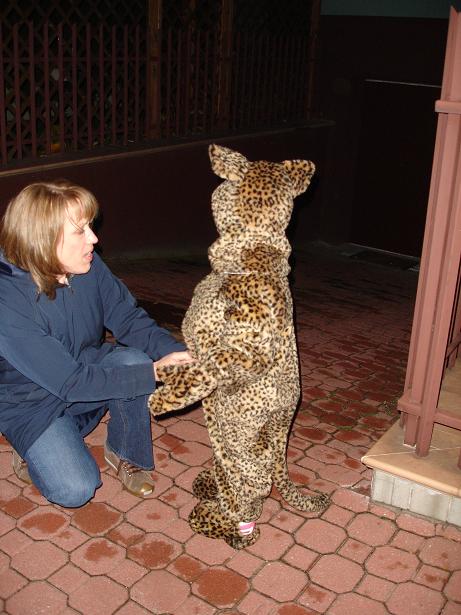
Lilly, my little cheetah, was not having a good night, so this is the best picture I could manage (you can't see, but she's actually sobbing here). I saw her at four different times during the evening, but she just wasn't a happy camper...Halloween was a bit overwhelming.
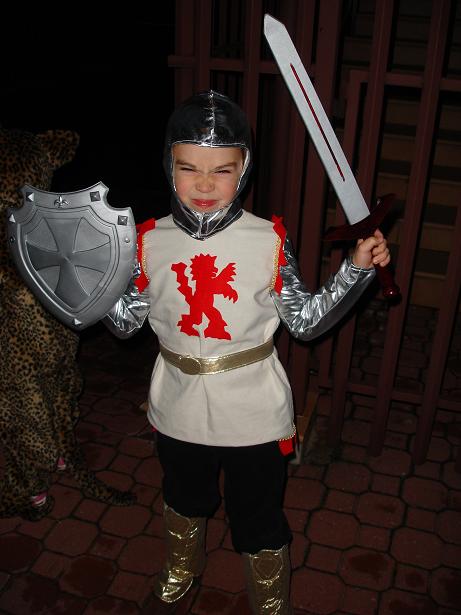
Lilly's older brother Adam had a fabulous time and really hammed it up for the camera. I really loved making this knight costume!
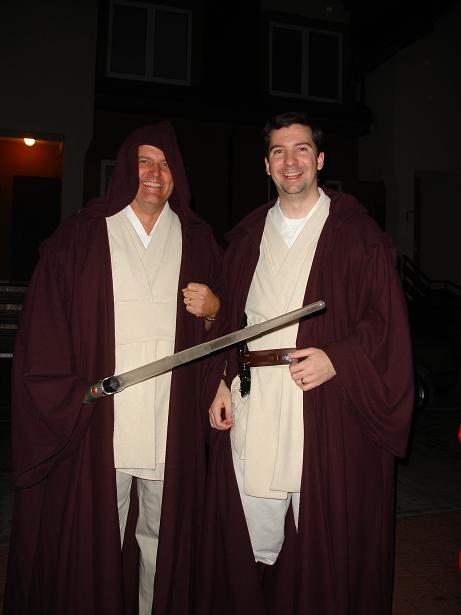
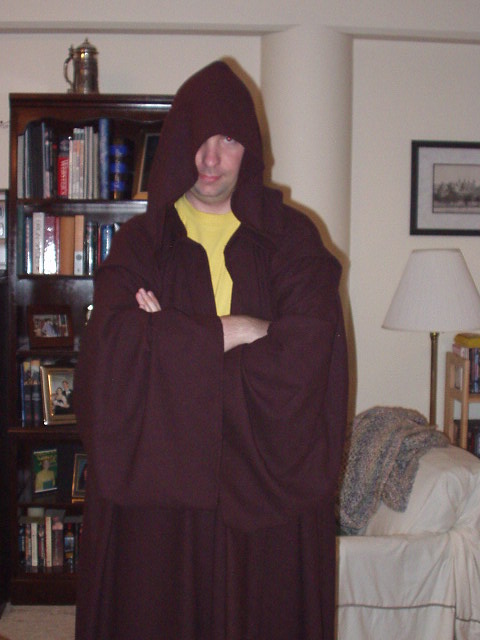
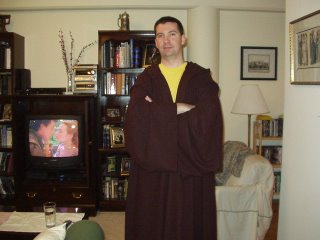
David and Dave, showing off their matching Jedi costumes. Dave needed a padawan braid to really make this pair costume go over the top, but oh well. There's always next year.

Tuesday, October 10, 2006

Halloween Countdown

Well, I haven't been posting too much lately because there has been a surprising amount of productivity. I am almost done with my Halloween orders for 2006 - this year I've made 2 complete Jedi costumes, a knight, a cheetah, a belly dance, and a pea-in-the-pod is still in progress. If I get all that done, I have the stuff for a Padme costume so I can match Dave. THEN it's on to my marine ball dress - the fabric is en route.

Here are some final product pictures (I promise to chase down the kids on Halloween to get cute pictures of them IN the costumes):

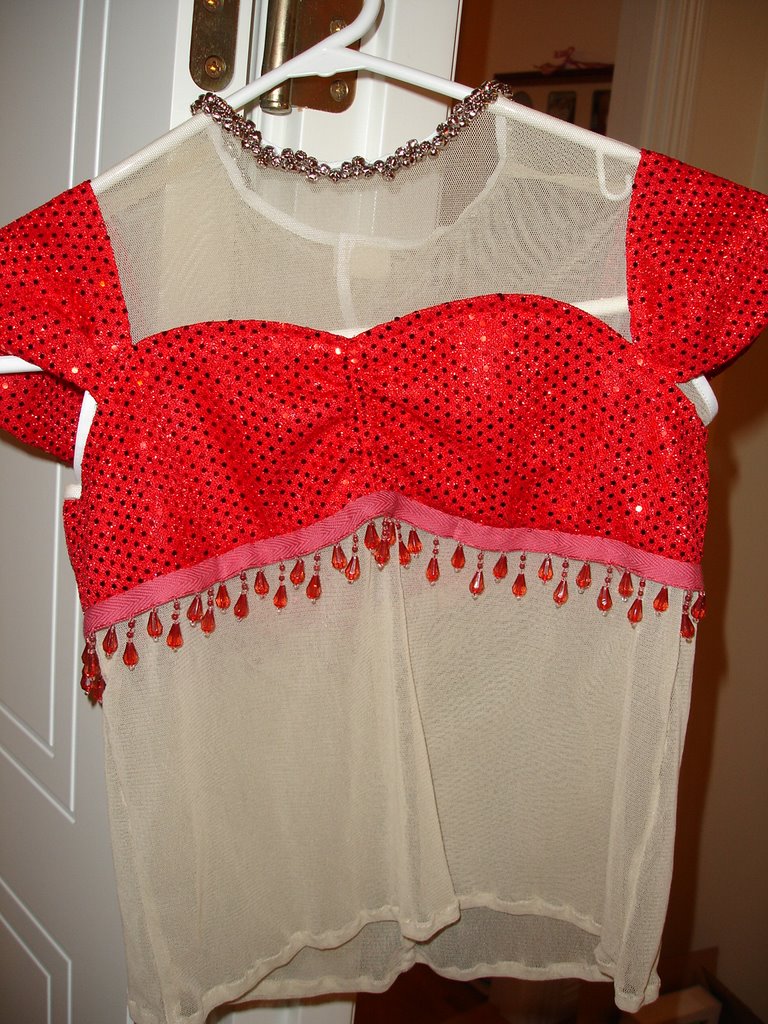
The belly dancer costume - I'm still working on the hat/veil. She also has a coin scarf to go with it. The close up shows the jingle bells I sewed into the neckline so the costume makes a bit more noise. I also love the beads around the bra top.
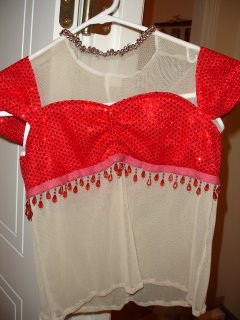
The top and the harem pants. I stuck on some little gemstones in the yoke of the pants. The mesh fabric on the top was a real bear to work with.
The knight costume - complete with silver stretch helmet! The costume is duck cotton, felt, and gold gimp for decoration. I really like the fusible interfacing that irons right on (that's how the lion was attached).
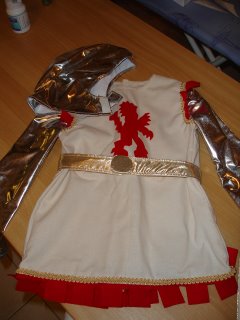
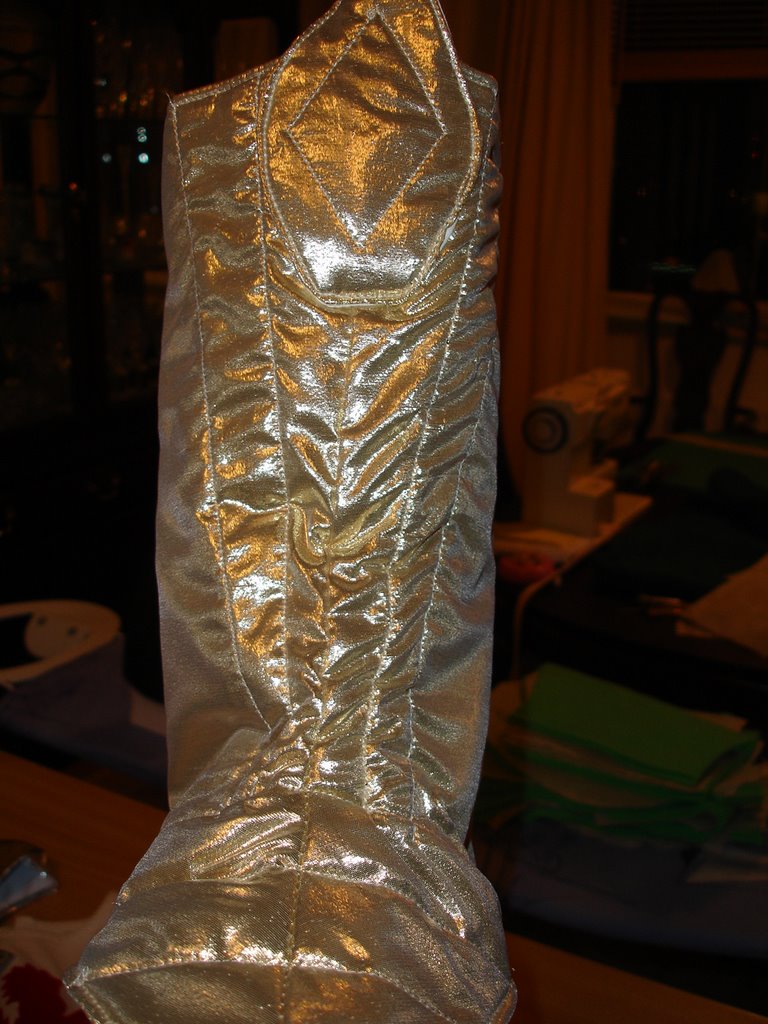
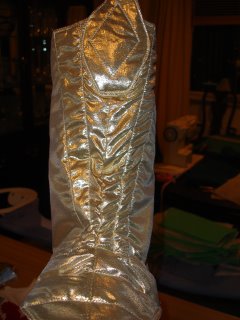
Here's a close-up of the "boots" - they're quilted gold lame and fit over sneakers.
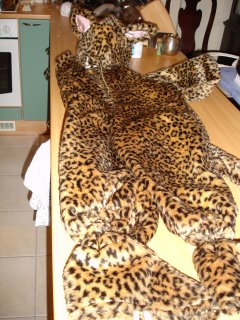
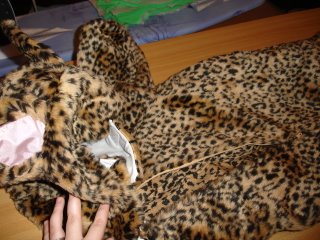
Here's the rather impressive cheetah costume - it comes with shoe covers, mittens, and a hat (along with the jumper). I didn't get a good shot of the tail...but there is one!Different angle that shows off the fake fur. I thought the fake fur was going to be really horrible to work with. Other than making a bit of a mess when cutting, it wasn't any harder/easier to work with. It did get bulky at some seams, but you could just cut off the fur to make the fabric thinner.
Wednesday, September 13, 2006

Finished, This Jedi Robe Is

I really like Simplicity's new Star Wars pattern. I decided to make it out of Silk Noil (sometimes known as raw silk). There were times the silk was frustrating to work with, but this really only came up when I was trying to sew it to interfacing. The final result is great, and Dave has decided he wants one too. I've already ordered the fabric for him, and if time permits I might make a Padme costume I've had sitting around. It all depends on how much time I have left once my halloween commissions are in. Here is a picture of the entire Jedi costume:

Sunday, July 30, 2006

Jedi Robe II

You may or may not remember, but I have made a jedi cloak in the past. It was the same year attack of the clones came out, and the pattern companies still hadn't gotten their acts together in creating star wars costumes. As part of my Halloween business, I have received a commission to make a complete Jedi outfit. I had a snafu obtaining the silk I needed on eBay, and as a result I'm still waiting for the fabric to make the tunic. However, the cloak is done. It's Simplicity's new Star Wars pattern (#4450)based on several costumes from Revenge of the Sith (there's a Padme pattern that was cut from the movie...I don't understand why they marketed a dress that was not even included in the movie).
The cloak is made of flannel wool. The pattern was very easy, and went together quickly. I especially like the shoulder pleats. I tried to mimic this on the last cloak I made, but it was much more successful on this particular pair.
**A note on Fabric yardage - the pattern says you need 7 yards of 60 in. fabric. I got 8 yards of 45 in fabric. I had to refold the fabric the wide way, and managed to make this cloak out of less than 4 yds. Save yourself some money and order less fabric. I think Dave might get a cloak of his own this year....

Monday, October 31, 2005

Happy Halloween!!!

Hope everyone had a great Halloween!!
To answer your questions about Poland and Halloween: no, Poland does not do anything Halloween related. A couple of the restaurants in town had a few pumpkins out and offered 'Halloween' special menus, but I didn't see any Halloween parties, etc. One of the Embassy compounds had a special trick or treating for the American kids. The American households decorated and let the kids come around for candy.
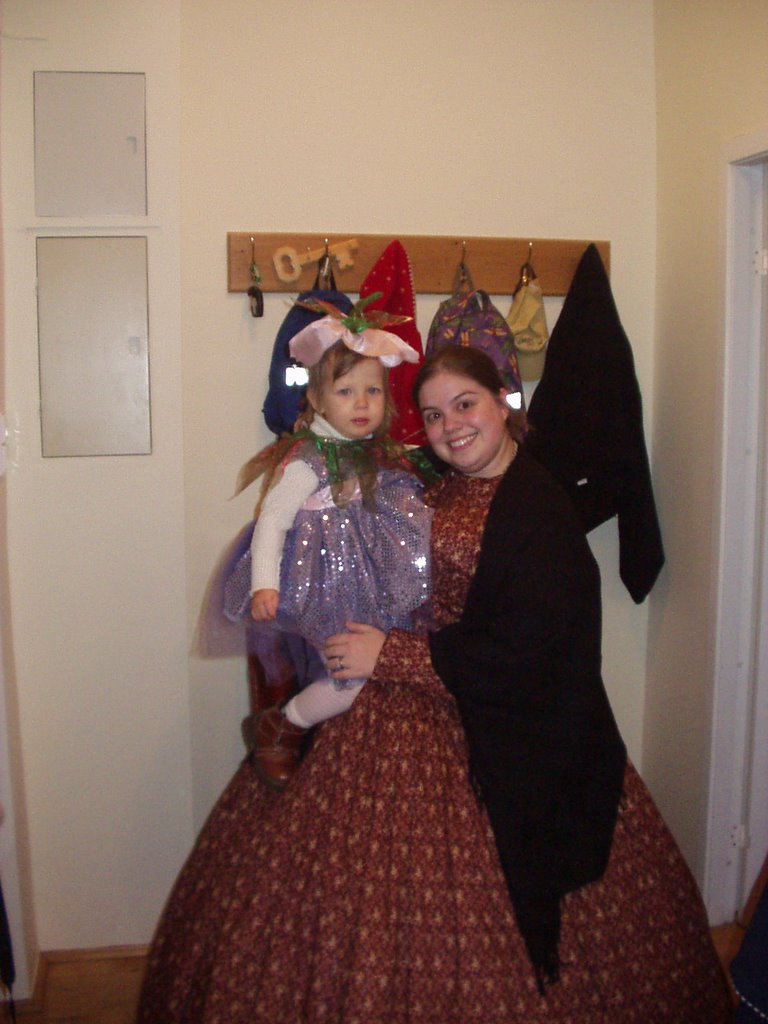
I decided to impose myself upon a nice family so I could dress up and hand out candy. I got pictures of all the costumes I made this year, including this great snap shot of Nadia and I!
I didn't make the black shawl I'm wearing...it's actually a cute black cape that I got to wear for fall. When I pair it with a modern boot cut jean and leather boots, it's actually very modern and chic. But it turned into the perfect civil war paletot when paired with my day dress.

Happy Halloween!

Wednesday, October 26, 2005

3 Hour Leia Costume

This was supposed to be a nice, easy project that would keep me occupied for a few days, but several events beyond my control turned this into a last minute mad dash.

I decided I really wanted to make the costume out of a polyester double-ply fabric, which is what the original Leia costume was made out of (plus, it's cheap). Knowing I would have to scour fabric stores for weeks in Poland to find this, I decided to order it from Fabric.com 3 weeks ago. I only just received the fabric on Monday. Late Monday night I opened up my package and found only ONE yard of fabric, even though I'd ordered 4 yards.

Plan B: find Polish fabric store, and quickly.

Tuesday, I planned to go to a few stores open late after work, but I had a meeting that kept me out until 8:15. That left today, Wednesday, for everything. The costume had to be finished by Thursday so it could go home for the little girl to wear to school on Friday.
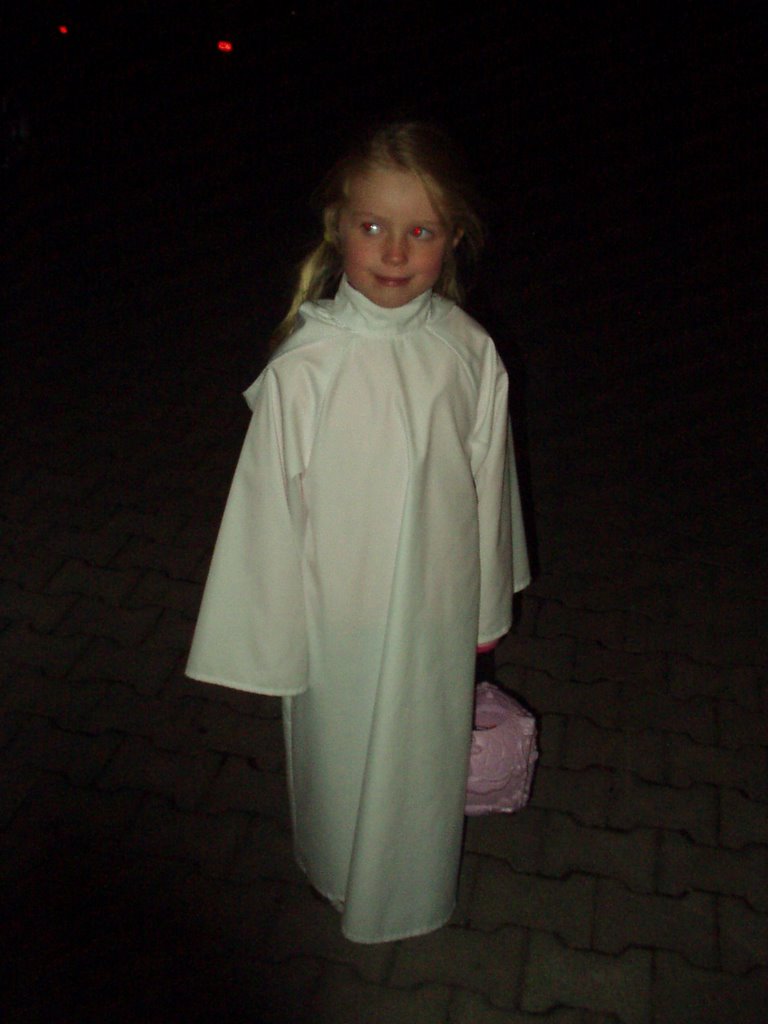
At this point I was panicking because I was in a time crunch. I knew I needed the fabric tonight if I had any prayer of finishing the costume, I was only going to have about 40 minutes at lunch to shop, find a store I could get to on foot, and hopefully luck out and find fabric that worked. Big Kudos to my Polish colleague who gave me several addresses, and Polish vocab words: the second store had what I needed!! phew! Thankfully Princess Leia wore a nice simple dress, and the Simplicity pattern was cut out and sew up in about 3 hours.

Happy Halloween, and may the Force be with you!

Thursday, September 22, 2005

Fairy Wings


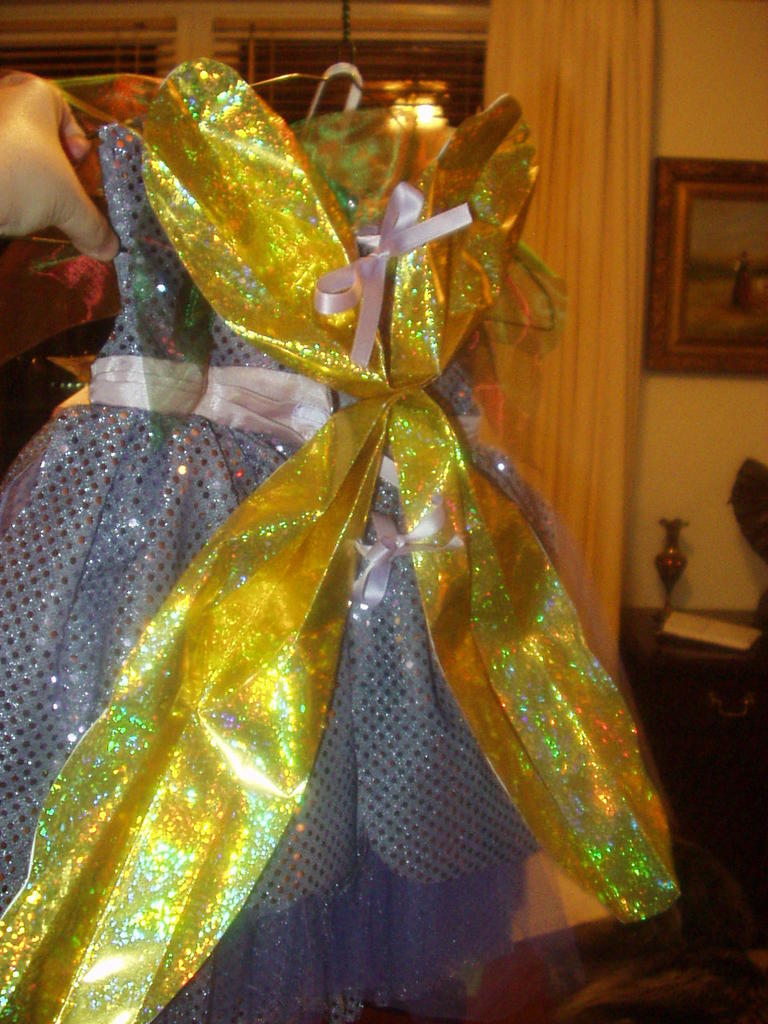
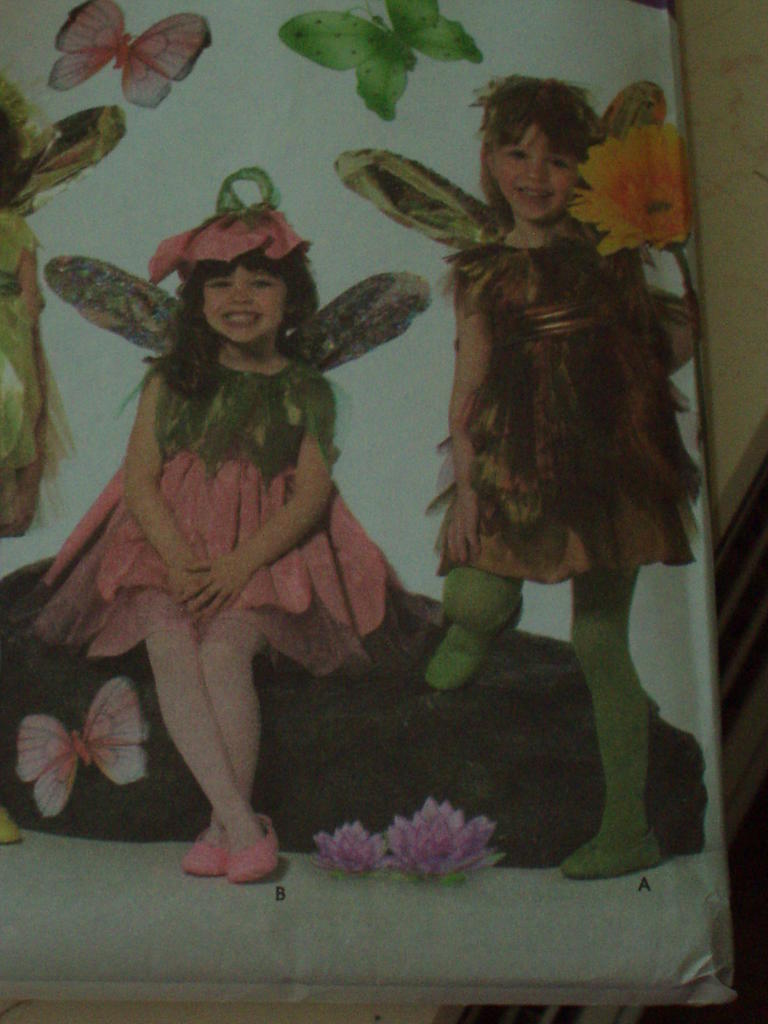
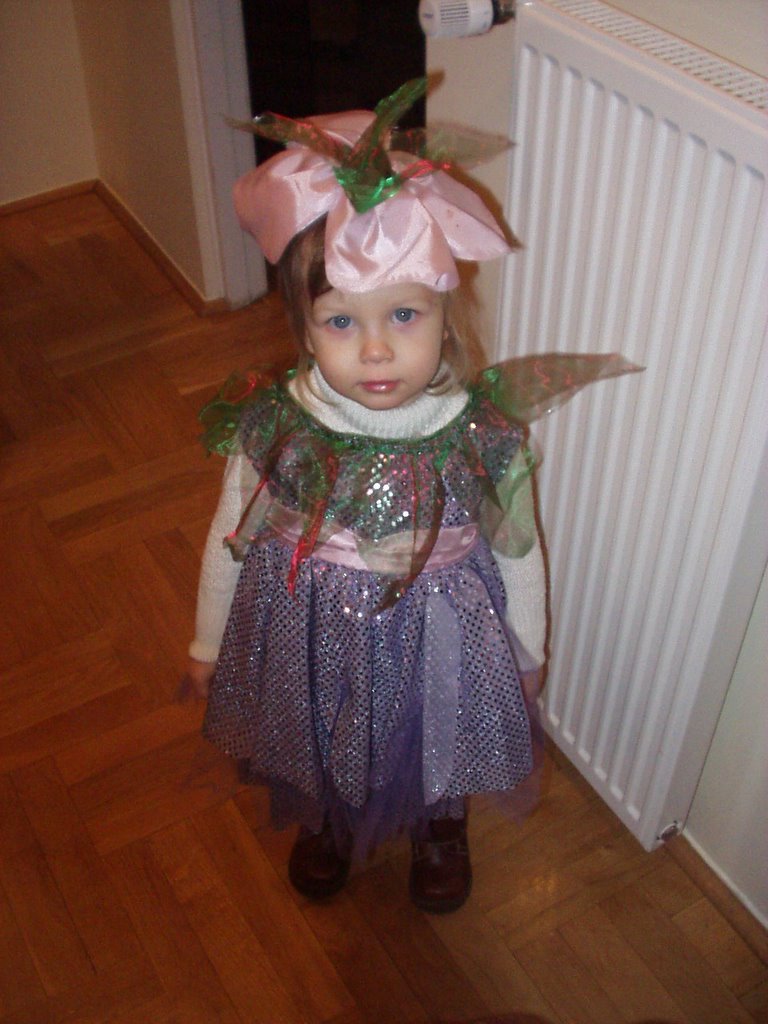
The little flower fairy dress is now 100% complete. Here are the wings, made out of wrapping paper. They sort of stuck out at a nicer angle when they showed them on the pattern envelope, but since I didn't want to string wire through them (3 year old child running around with protruding wires just didn't seem to be a wise idea) this will have to do.

I promise to get pictures of the adorable fairy herself, but I'm waiting to deliver the costume until we're closer to Halloween. Reason #1 is if I were a 3 year old girl, I would put this on and never want to take it off until NEXT Halloween. Reason #2 is I don't want it to get out around the office that I'm sewing Halloween costumes. While I would be willing to hire out, I don't think most people would want to actually pay my fee (whatever that would be) on top of an already healthy-sized fabric/pattern bill.

Anyway, I don't think my next project will be the Tudor dress. As much as I would like it to be, I am, alas, without a fabric budget this month. Since my mother managed to snag a new civil war pattern (top left) for me during JoAnn's 99 cent Simplicity pattern sale, I think I'll try to pick up the civil war day dress project again. The fabric is ready to go, and all I would need is to find some cotton muslin/lining material wich is very inexpensive.

Monday, September 05, 2005

Bippity, Boppity, Boo!

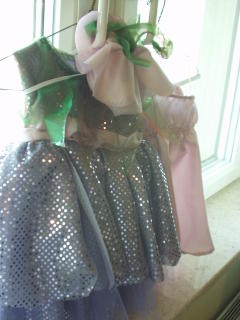
What happens when one has entirely too much time on one's hands?? You finish the project that was suppose to keep you entertained for the next month in one weekend. Wrapping paper wings still to come, though.
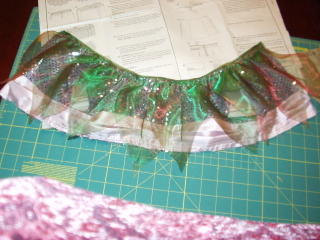
One of the biggest challenges on this project was dealing with the various fabrics I had purchased. The sequins on the purple fabric have been glued on. Every time the needle ran through a sequin, some glue residue would coat the the needle. Then the thread would start sticking to the needle, and would break. This sometimes happened every 3 inches. It drove me crazy. Below is the leaf collar: this process involved several broken thread crises.
The nice pinkish fabric and the green organza would ravel if you looked at them funny. A lot of the edges in this costume were left raw and were not finished...which caused problems. I solved this by using fray check.
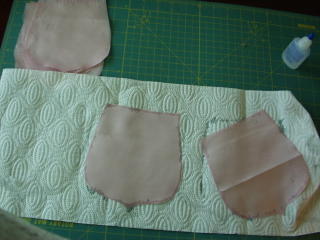
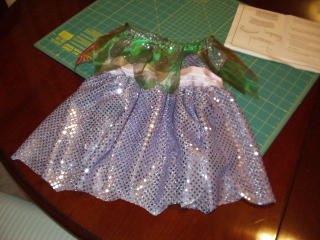
Another source of frustration was attaching the skirt to the bodice. The skirt is several layers. First, you attach 10 petals to the bodice, and it looks like this:

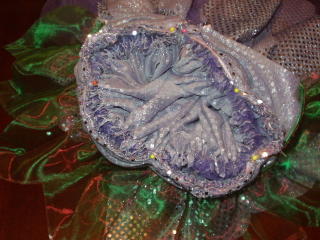
After this, you cut three ENORMOUS skirt panels - a good two times taller then I am for a child-sized dress. Then I did the same with purple tuile. Then, I sewed the skirt and tuile together, and gathered it to fit the bodice. There was so much fabric, I had to gather it up as much as possbile for it to fit. Then there was the problem of attaching this massive skirt to the waistline. This picture tries to give you an idea of big it was: I had a hard time getting the fabric to fit under the sewing machine foot.

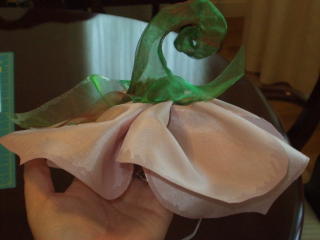
I think my favorite part of the costume is the adorable little flower petals hat, complete with a stem. It went together without a fuss, and I think is should look absolutely adorable!

Sunday, September 04, 2005

Fairy update

I've been having fun sewing some over the long weekend. It gives me time to finish the project...and keeps me from getting bored as well.

I finished the small jumper/panties set that goes underneath the almost transparent fairy costume. I went ahead and then started on the bodice and sash. Since I got to see the little girl on Friday night, I took the jumper and tried it on to make sure I had the right size. It was a great fit, and she seemed to really like it, or at least I assume she liked it since she didn't want to take it off.

Tuesday, August 30, 2005

Sugar, Spice...and Fairy Dust


A great recipe for a little girl's first Halloween costume. I am still without a sewing budget, so I'm finding other ways of distracting myself. Like making other people's costumes!

A couple I work with has an adorable little girl that will be celebrating her first Halloween. I'm making her a little flower fairy costume. I picked up the pattern while I was at home, and went to the $2 a yard bargain bin and found some great fabric! The fun sparkly fabric is the kind of stuff I would never normally work with as a historical costumer, so this is a fun project for me.

Sunday, December 19, 2004

Completed Jedi Robe


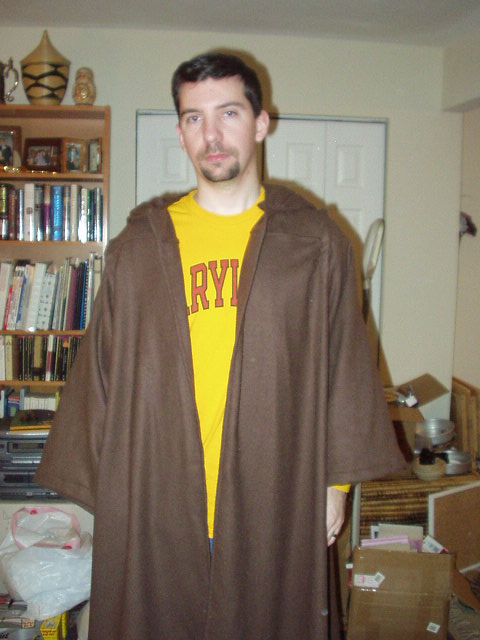
Thanks to my husband for posing!


The Jedi Cloak is all finished, and ready to ship out. I finished the last of the seams today, and hemmed it up. I finally decided to go ahead and add a pleat to the shoulder area. I think the end result really looks nice, and the large spacious hood is exactly what I would expect to find in the Star Wars costume room. At a futur date, my friend might look into the matching tunics to make a complete Jedi costume (out of silk noil!), but for now, this wraps up my jaunt into Star Wars sewing.

I'm going to wait until after Christmas (to see if I have any new patterns or fabric funds) before deciding what my next project should be.

Saturday, December 11, 2004

Jedi Robe: Change the Sleeves, or not???


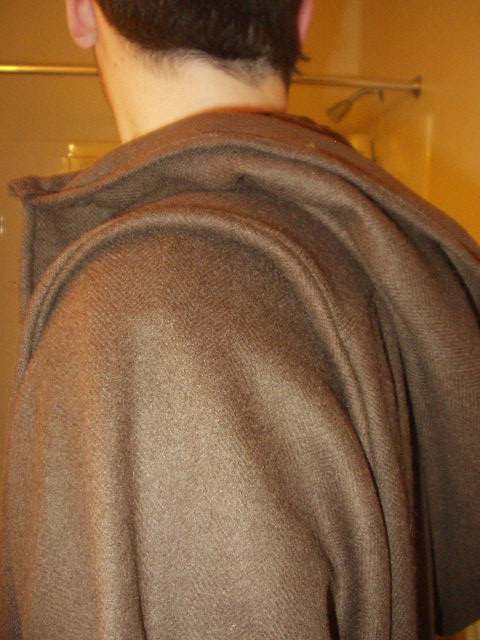
Sleeve with a nice tuck/pleatPosted by Hello


The unaltered sleeves

The final decision that I need to make on the cloak is whether or not I would like to alter the sleeves. The top picture shows the nice drape that results from a small pleat make right at the shoulder of the garment. The bottom picture is the sleeves as they look right now. I need advise. Which do you guys think looks better??? Again, if you need to see the real cloak, click here.

After this, I just need to finish a few more seams that are still raw, and hem the bottom to the correct legnth. That should be interesting since this is a gift, and that certain someone doesn't live in the area. A lot of careful measuring will be called for. Posted by Hello

Jedi Robe: New Hood


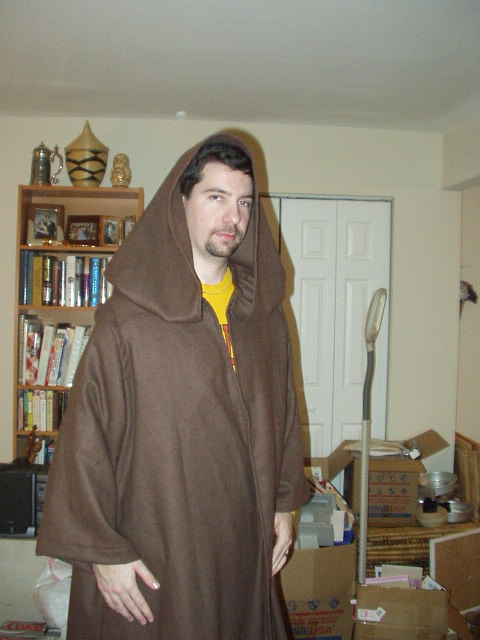
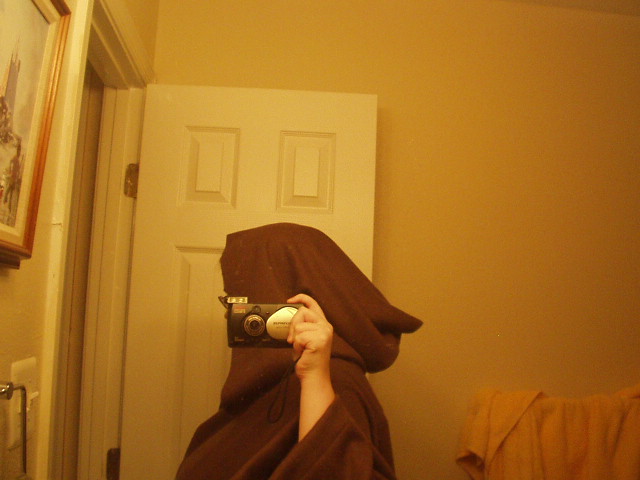
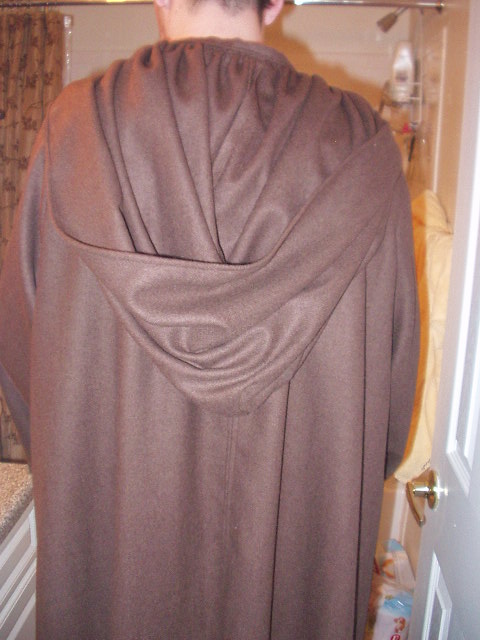
The next step was altering the hood. I really disliked the way the hood on the pattern came to a point in the back. It looked a bit moroccan, but it wasn't what I was going for. I first tried to round out the pattern peice that came with the Simplicity pattern, but the hood wasn't big enough, and it still seemed to come to a point. I also didn't care for the seam placement or the pleats it used.

Instead of messing with the old pattern, I decided to make an entirely new hood. The Padawan's Guide had great directions that I was able to follow. The result was the second picture: it's larger, rounder, and falls the way it should in the back. The hood began as a large rectangle, and was gathered onto the neckline to the make the hood. On the front, the hood will even fold over a bit over the shoulders which is exactly what they did in the movies.

Jedi Robe: Altering the pattern


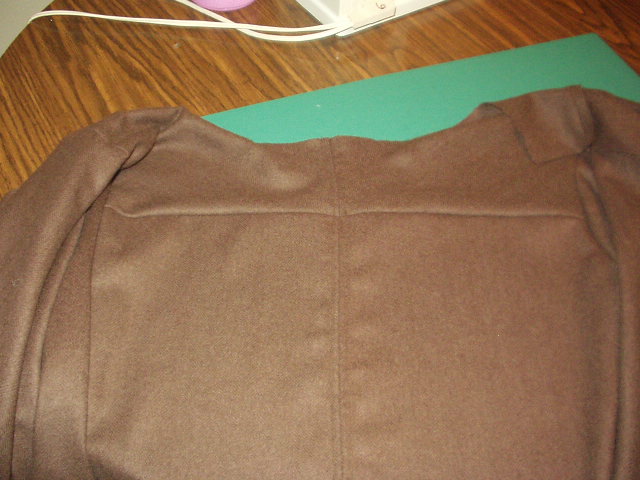
Posted by Hello


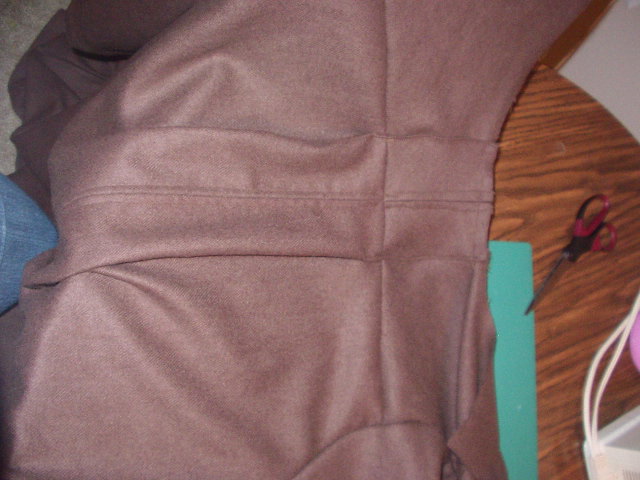
The gorgeous camel wool fabric for the Jedi Robes arrived this week, and the project is well under way. As a Simplicity costume pattern, it was very easy and quick to assemble. However, there were several alterations I wanted to make to the pattern to make the finished product nicer. Today, I started with the back of the robe. I noticed that the cloak was lying very flat, and wasn't draping as nicely as it could with such a nice wool. So, I added to pleats at the neckline in the back, which now helps the drape in the back. Posted by Hello