Monday, September 05, 2005

Bippity, Boppity, Boo!

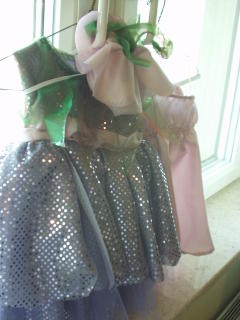
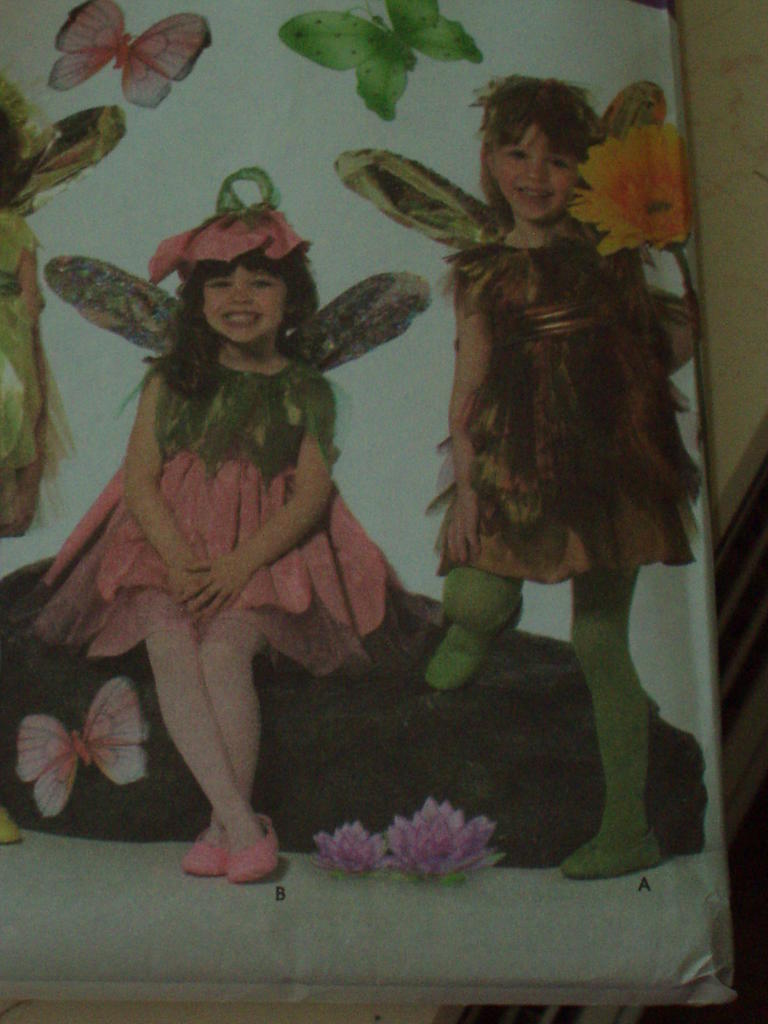
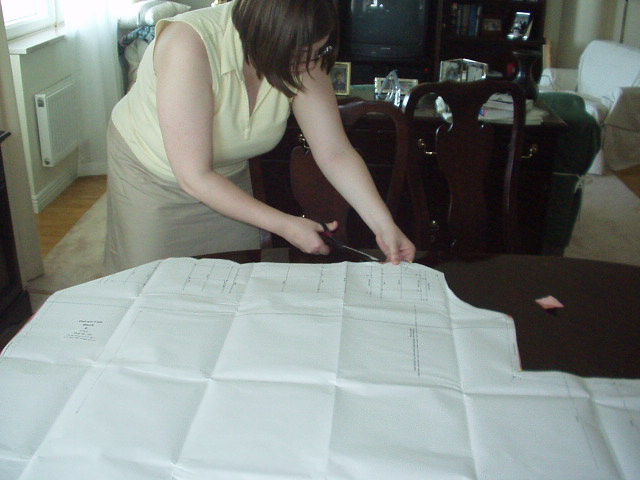
What happens when one has entirely too much time on one's hands?? You finish the project that was suppose to keep you entertained for the next month in one weekend. Wrapping paper wings still to come, though.

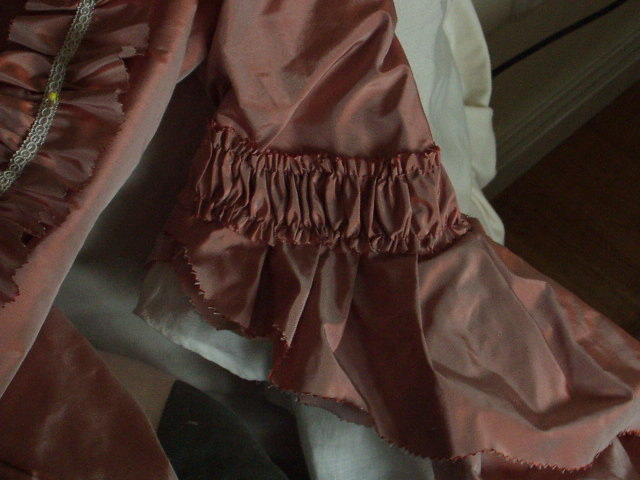
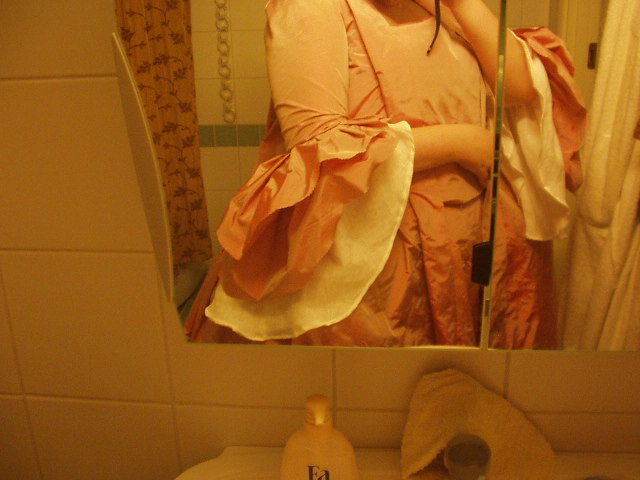
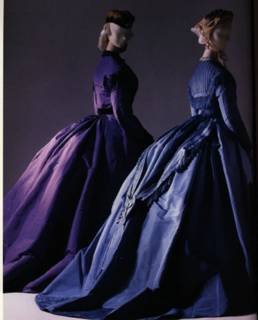
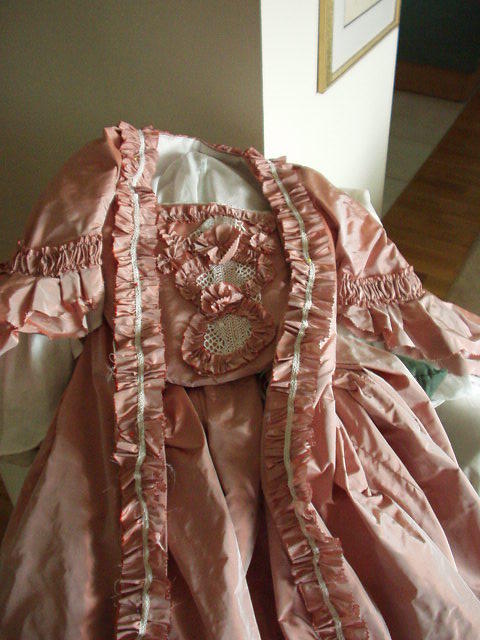
One of the biggest challenges on this project was dealing with the various fabrics I had purchased. The sequins on the purple fabric have been glued on. Every time the needle ran through a sequin, some glue residue would coat the the needle. Then the thread would start sticking to the needle, and would break. This sometimes happened every 3 inches. It drove me crazy. Below is the leaf collar: this process involved several broken thread crises.
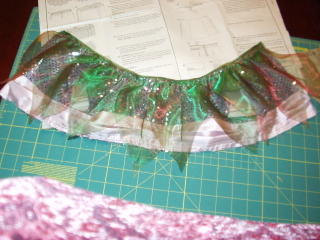
The nice pinkish fabric and the green organza would ravel if you looked at them funny. A lot of the edges in this costume were left raw and were not finished...which caused problems. I solved this by using fray check.

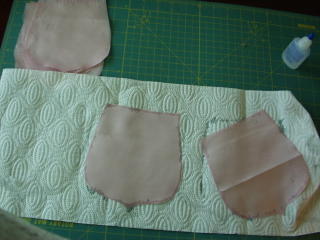
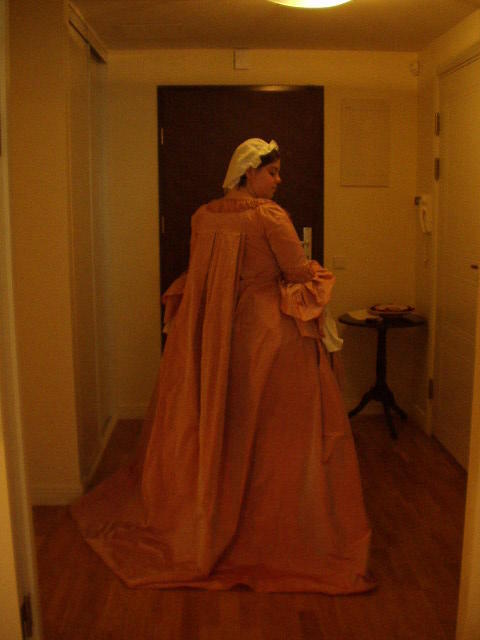
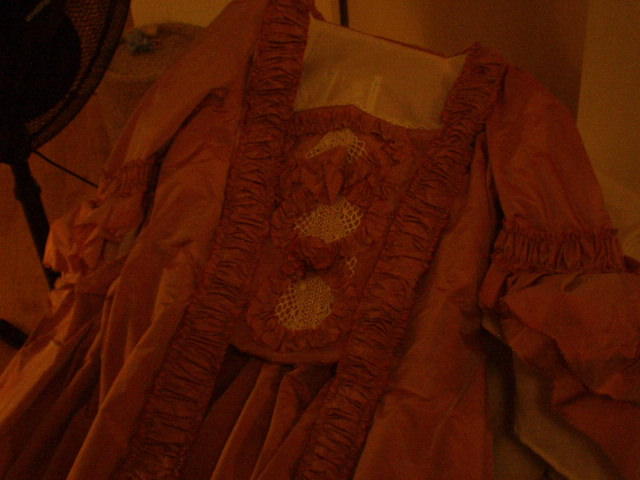
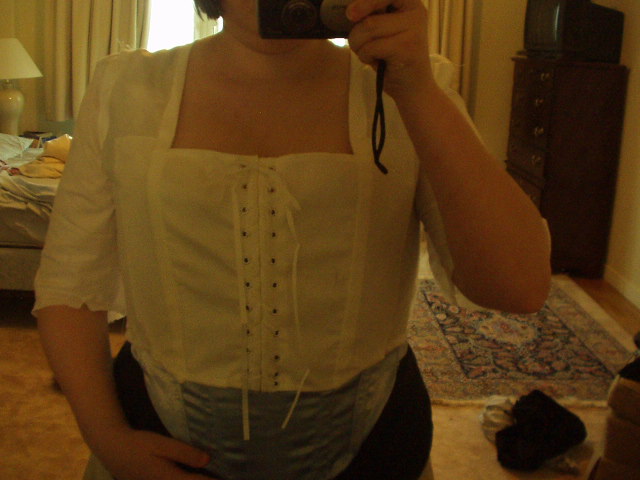
Another source of frustration was attaching the skirt to the bodice. The skirt is several layers. First, you attach 10 petals to the bodice, and it looks like this:

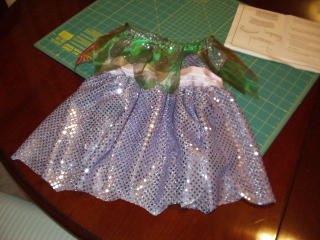
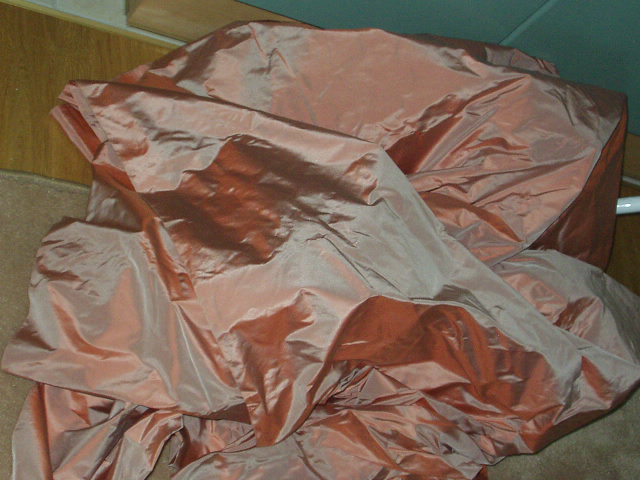
After this, you cut three ENORMOUS skirt panels - a good two times taller then I am for a child-sized dress. Then I did the same with purple tuile. Then, I sewed the skirt and tuile together, and gathered it to fit the bodice. There was so much fabric, I had to gather it up as much as possbile for it to fit. Then there was the problem of attaching this massive skirt to the waistline. This picture tries to give you an idea of big it was: I had a hard time getting the fabric to fit under the sewing machine foot.

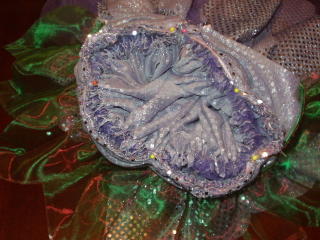
I think my favorite part of the costume is the adorable little flower petals hat, complete with a stem. It went together without a fuss, and I think is should look absolutely adorable!
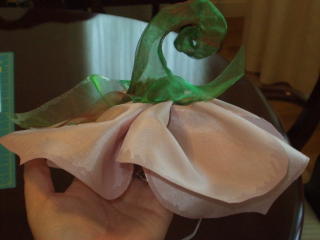
Sunday, September 04, 2005

Fairy update

I've been having fun sewing some over the long weekend. It gives me time to finish the project...and keeps me from getting bored as well.

I finished the small jumper/panties set that goes underneath the almost transparent fairy costume. I went ahead and then started on the bodice and sash. Since I got to see the little girl on Friday night, I took the jumper and tried it on to make sure I had the right size. It was a great fit, and she seemed to really like it, or at least I assume she liked it since she didn't want to take it off.

Tuesday, August 30, 2005

Sugar, Spice...and Fairy Dust


A great recipe for a little girl's first Halloween costume. I am still without a sewing budget, so I'm finding other ways of distracting myself. Like making other people's costumes!

A couple I work with has an adorable little girl that will be celebrating her first Halloween. I'm making her a little flower fairy costume. I picked up the pattern while I was at home, and went to the $2 a yard bargain bin and found some great fabric! The fun sparkly fabric is the kind of stuff I would never normally work with as a historical costumer, so this is a fun project for me.

Tuesday, August 16, 2005

Pictures of Gown


Here's the finished product!! If you want to compare it to the inspiration, click here.

Sunday, August 14, 2005

Robe Francaise Complete!

My Robe Francaise is now 100% complete, and I even had time to make a little pinner cap for my hair today. Yesterday, Katie helped me pin up my hem and attach a pleated flounce to my underskirt.

We then spent lots of time, cutting, pinking, sewing, and gathering ruffles and ruching for the dress. My first attempt at decorating the dress did not come out the way I wanted, so I started again today. To the left are pictures of my trim options.

Below are the finished underskirt and sleeve trim.


And while I realize this isn't the greatest of pictures (the sun had long gone down when I finished sewing), here is a picture of the final product.

I'm desperate to go outside in good light and have some pictures taken with me actually wearing the dress...but Katie left this morning, so I don't have anyone to take picutres of me. Rotten timing. I know.

Unfortunatley, since I'm out of muslin, and I'm currently paying off next week's vacation, there isn't any fabric money this month. I also don't have any more projects sitting around waiting to be started (other then the evil civil war dress that is on hold until Simplicity has a $1 sale and I can get a new pattern), so I imagine there isn't going to be much sewing for me to post about in the next few months. Just lots of dreaming and planning.

Wednesday, August 10, 2005

Plotting!!


Hi All!!! Well, I haven't been sewing very much lately. I must admit that I have been distracted by visitors and traveling about. I haven't felt very inspired to finish trimming my 18th century gown, and the thought of working on my civil war gown with the horrible pattern I have is depressing.

So....

I'm planning my next project!! I want to make a Tudor gown (this was the time of Henry VIII and his six wives). I already have the pattern and have selected the fabric I want to use. I'm using a great red brocade, with gold brocade undersleeves and underskit:

For the oversleeves, I'll use a matching deep red velvet. Now I just have to save up the money for the fabulous fabric.

I'll need to make a linen shift to go underneath the gown: the puffy sleeves of the shift are pulled through the slashings of the sleeves to show through. If I have the patience, I could also do blackwork (or spanish embroidery) to complete the look of the shift. I have no clue where to get the pattern for the chemise, and would like to avoid purchasing another pattern, but the well known elizabeth 'smock' generator doesn't have the required puffy sleeves. I'm planning on trying to use my 18th century stays instead of making yet another corset, and I've already got a set of farthingales (aka hoops from the time period).

For accessories: I'm going to make a french hood to go with the dress, and I've also found a great place to purchase necklaces/girdles/and billaments for the dress called Sapphire and Sage.

Tuesday, July 19, 2005

Nips and Tucks

Just doing a bit more house-keeping while I have down time. Today, I shortened my fully boned 18th century corset so that it will be more comfortable. It provides a bit more of a firm conical shape then the blue satin corset that I've been using to fit my Robe Francaise. It was always too long after I finished it, so I opened up the top bias tape, measured down 1.5 inches, and then just cut the excess off and rebound it. I can't actually lace myself into this corset, but it looks like it's going to fit much better. You can see the original fit here.

Monday, July 18, 2005

Trimmed Stomacher

I finished trimming my 18th century stomacher tonight. I sewed on some fine lace, and the attached ruching in a 3 tiered figure eight. 4 pinwheels then decorate a few remaining spots on the dress. I need a second opinion: should I add on any more pinwheels? I see two spots that could be covered up, but I don't want to overdo the trim. So far I like the overall effect, though I think I would be happier if the last tier of the figure eight weren't so circle like...

What do you all think?

The stomacher trim was inspired by this original garment.

Wednesday, July 13, 2005

Finished Corset

Here it is! I finished another Victorian corset. Why you ask? Well, I tell myself because I wanted a prettier corset that had gussets to make a nicer fit for a curvy person such as myself, but the truth is: cause I wanted to!!! I finished up all the little details, right down to nit-picky embroidered 'x's on the outside. I think it really does make a nice profile with less of a shelf look that my other corset. However, my other corset is ten times easier to get into!

18 century accessories

Hi all. While I wait to find a better solution to my raveling pinking for the 18th century gown, I continue to look for accessories to make the outfit complete. I saw this silk and ivory fan on ebay for a steal (really Dave, I promise), and just couldn't resist. It has some less-than-period feathers on the tip of the fan, but it looks gorgeous. Plus it's the from 19th century, so it's a little peice of history. It's nice and big too, which was the style in the 18th century. This fan is 11 inches long when closed. Not a tiny little hand fan.

Monday, July 04, 2005

Satin Victorian Corset


While I wait to find out how to trim my Robe Francaise without the pinking raveling, I decided to start another project I had purchased supplies for. I always loved my victorian corset. You can see a great picture of it in my archives. But when I heard that Simplicity had come out with a more advanced corset pattern, I knew right away I had to give it a try. Unlike my practical white cotton coutil corset, this one will be made out of peach satin coutil.


One reason I really like this pattern is that it includes bust and hip gussets, and creates a more 'hour-glass' shape when it's finished. Here you can see I've hand sewn in the gussets. Since the gusset sizes are determined by your bra cup size, I think the finished corset will also fit better.


I started the corset yesterday and really got into a sewing mood. Today, I was able to finish sewing in the lining...

...and set in the eyelets and busk. The eyelets took a long time, about four hours (the only reason I know is I sat through two movies to finish them). My hands are pretty blistered after working with the grommet setter. None of the boning channels have been sewn in yet, but the garmet itself is pretty much assembled.

Tuesday, June 28, 2005

Basic gown complete

The basic dress is all assembled! Yippee!!! The picture is completely underwhelming, but here it is. Check out the gorgeous sleeves!!!

So, here's what's left on the To-Do list:
  • hem the dress (I need a helper for this)
  • Tack the fold of the dress down so it won't fold back
  • Sew in hook and eyes for stomacher*
  • Trim the dress
  • Have someone else take some pictures. I'm getting tired of the silly/ugly mirror pictures, unworthy of the glory of this gown.

*I tried pinning the stomacher to the dress, and after stabbing myself repeatedly with the pins, and then still having the stomacher move and pull around, this is required. Kendra, of Demode, did this on her dress and it looks great.

Monday, June 27, 2005

Gown Coming together


The robe francaise is coming together very nicely! The lining is attached to the completed dress. I'm in the process of sewing on the sleeve flounces, and then I'll need to sew up the stomacher. A quick hem, and the gown will be ready to wear. I'll still have lots of trim to add the dress, some of which I still need to buy, but I'm very happy with the way the dress is coming together.

My biggest gripe so far about the pattern was when I sewed in the side extension and pleats. This part isn't visible on this picture, but the instructions were very confusing, and I walked through the process about 6 times before I finally figured out what I was supposed to be doing. There was a neck binding piece that was also very frustrating because I had to take it out and redo it several times due to unclear instructions. Despite these issues, the gown is fitting nicely, and I can't wait for the final product! See the pretty back pleats below.

Does everyone agree with me that I MUST have a fan to go with this outfit? I've also got to figure out what to do with my hair since my haircut is all wrong for the time period. I could probably make a little lace cap, pin my hair back, and then cover it all with the cap.

Saturday, June 18, 2005

Completed Lining

Here's the finished lining. Inbetween my last post, I became paranoid about the changes I'd made to the neckline of the muslin, so I went ahead and made up a muslin Robe and sewed it to the muslin of the lining to make sure it fit. Surprising, everything went together just fine, so I went ahead and started making the final product.

The first thing I did was take apart the muslin of the lining, and then re-stiched everything together. When I'd been working on the muslin, I'd been using green thread, and hadn't been backstitching. I also attached the boning and ties to the back of the lining that will permit me to adjust the size of the dress (this is a really neat feature that allowed women to easily let their dresses out when they got pregnant). Other then needing a second person to help me adjust the ties in the back, everything is fitting nicely, so I added the eyelets to the front, and I'm now moving on to the Robe.

Sunday, May 29, 2005

Pools of Taffeta!!


Hurray for the arrival of the taffeta!! May I say that 14 yards of silk taffeta is a beautiful, beautiful thing! I went ahead and cut out the entire pattern, including the pieces I need for the skirt. Altering the pattern from the pet-en-l'air to the robe francaise was very easy, and JP Ryan's instructions were very straight forward. I have some thread and might start sewing the skirt up, but I'm not going to delve too far into this project until the box of supplies my mom sent me arrives. She's sending interfacing, some thread, pinking shears, and very fine needles for the silk. I have TONS of fabric left over, so I now need to start deciding how I'm going to trim this fabulous gown. Anna has already promised me lace from Belgium for the sleeve flounces! :)

Saturday, May 21, 2005

An Act of Desperation...


Thanks to the meeting of the European Council of Ministers, I haven't received mail in over a week. Having my 18th century gown fitted and ready to go, but not having my fabric, is driving me nuts!!!

So....since I had the fabric for my civil war day gown lying around collecting dust, I decided to start on it today. Everything was going alone very well. You can see by the picture above that the muslin was fitting fairly well after just a nip and tuck here or there. But then, these little nasty surprises started cropping up, courtesy of the pattern!

1. The pattern pieces overlap each other on the paper, meaning you can't just cut them out and use them!!! You actually have to go through and trace new peices for the darn thing!

2. The sleeves are just awful! The pattern says 'ease' the sleeves into the armhole, but they should really say "drastically gather the sleeves." My first attempt at this created a horrible poof, and since 1850-1860 dresses arm holes are actually well off the shoulders, it was making me look line a line backer.

3. There are supposed to be CUFFS??? This is mentioned in passing, but I have no pattern peices, and no directions for sewing them. Are the cuffs supposed to be lined, unlined, make of two identical peices sewn together?? How are they sewn in? How should I know.

4. The instructions are pure evil. They arrived, complete with pretty colored illustrations, lulling me into a false sense of confidence. But when you read through them, you realize that they are general directions for ALL of her dresses, frequently offering multiple options for how to proceed on every step. Over 15 pages of very generalized directions that were written in random order with nothing specific about the dress/pattern I'm making (except for confusing illustrations of the finished product...showing cuffs when I have no pattern peice!!!).

...Needless to say this is not turning out to the be the therapeutical solution I thought it might be while I wait for my silk to arrive.

Saturday, May 14, 2005

Muslin: take two!


Here is my new Muslin! Notice how nicely it lays flat along the whole neckline now - I pinned out all of the eccess fabric that was causing gapping, but was careful to leave the arm holes alone. All the pattern pieces still fit together perfectly. I think this is the first time I've actually successfully altered a pattern (without causing fitting problems in other areas) so I'm very proud! We'll have to see if I can easily transfer the change from the linning to the real fabric (which by the way...has still not arrived). Below is a picture of the pinned muslin piece that is now my new pattern peice for the side front of the linning,


18 Century Satin Corset


Here are pictures of my new and improved satin corset. The corset doesn't really constrict my waist - it just pushes my bust upwards and makes the front profile of the 18th century. It sits a bit high on the waist, but I can forsee wearing this corset a bit more then my JP Ryan corset. I think the JP Ryan corset needs to be shortened a bit...and the thought right now of taking off the hand-sew bias strip and removing all the bones from the corset is just a bit too daunting.

Another feature I like about this corset is the wooden busk in the front, and the fact that I can get in and out of it by myself. My JP Ryan corset is definitely a two person job!

Sunday, May 08, 2005

Robe Francaise: Muslin


Here's the completed Muslin for the Robe francaise. I'm wearing it inside out, because I was pinning a few seams that needed adjusting. The only fitting issue I'm going to have is through the neck/shoulders area where there is too much fabric - this causes gaping from the shoulder to the bust area. I think I can solve the problem by sewing larger seams at the shoulder seam, which maked the pattern fit smoothly like it should. The sleeves fit well, and the understomacher (that front part of the dress) seems to fit right where it should.

The lining pieces do not match up with the pattern pieces exactly, so I'm a little nervous about how I'll transfer the changes I make on the muslin to the pattern itself.

This week I also did a little bit of work on a corset I bought off of ebay almost a year ago. I'd always been very dissapointed with it: it's a pretty blue satin 18th century corset, but very poorly made. After waiting for 4 months to receive it instead of the promised 4 weeks, the edges of the corset were left raw and unbound, the legnth of the corset was a ridiculous 5 inches too long (so I couldn't sit in it), and there were these silly unboned tabs that just sort of hung off the corset and didn't do anything.

Since my fully boned corset (pictured underneath the muslin above) is so uncomfortable, I thought I'd alter the blue satin corset, and see if I could make it work. I did a lot of cutting and handsewing one evening in front of the TV, and I think I have a much nicer finished product now. I shortned the corset, cut off the useless tabs, and bound the edges. It's a little short in the waist, which unfortunately seems to be a design flaw, but it's MUCH more comfortable, plus it actually has a wooden busk that makes it very period. Pictures to come!

Wednesday, May 04, 2005

A girl can change her mind...


Well, I was all set with fabric and pattern to start my civil war day dress, but I think I'm a bit burned out on civil war projects for now after the Ball gown. And, this weekend, the exact kind of silk taffeta I've been waiting for finally popped up on Ebay. How could I resist? So, I've changed projects, and my Robe Francaise is now underway.

I was so excited about the project, that I didn't even wait for my fabric to arrive, but instead went ahead and cut/sewed the muslin for the project. I finished it kind of late, and didn't feel like bothering myself or my husband to get laced into my 18th century corset and fit the muslin, so you'll have to wait for pictures.

Also, in case anyone is curious to see an example of the final product, the webmistress of Demode made her own Robe Francaise with this pattern, and you all should definitely check it out!