Friday, February 16, 2007

Saved by Fabric Surplus!

My regency corset project continues thanks to an extra yard of cotton coutil in my fabric bin. I honestly have no idea where it came from. It must have been extra from another corset kit.

So, I've started the Corset over again, this time one size up. I think I've finally gotten the hang of putting in the gussets. I guess the first one was kind of like the rough draft (I know, I know, that's what the mock-up is supposed to be...but this project took two rough drafts).
I toyed with adding an additional hip or front stomach gusset, but in the end I felt that it wouldn't be needed. If the gussets made the corset too big at the hips it would be ruined. I can always go back and add a gusset later if I still need one (though it would really be a nuisance!).
The picture above shows the corset lining (in the front) and the outer corset (in the back) before I sewed them together. All of the bust and hip gussets seem to be lining up nicely. The gussets were an issue with the first version and I wound up having to reinsert most of the gussets. Here's the assembled lining and shell pinned together. Now I'm reinforcing the corset's seams using a technique known as 'stitching the ditch.' You sew the lining and the shell together by carefully stitching though all the layers along the seams. Here's an illustration:
Up next is adding the boning channels. Then come the dreaded hand-bound eyelets.

Wednesday, February 14, 2007

Alterations and Frustrations

The Regency Corset has been advancing at a fast pace. I tried on the lining one last time and decided that the bust gussets needed to be lengthened because the bottoms of the gussets did not reach the bottom of my bust. I ripped out the old gusset panels, drafted a new longer version of the gussets, cut deeper into the corset, and sewed in the new panels. The old gusset is on the right compared with the new longer gusset shown below. I'm pretty proud of this alteration, and the lining fits much better now:So the next step was to repeat the process with the satin coutil, sew the lining and satin coutil together, sew in boning channels, insert the boning, bind the raw edges of the corset, and finally comes the painstaking hand sewing of the lacing eyelets. It took me about three days to accomplish these steps (sorry...I didn't take pictures of this phase...I was excited to finish).

As soon as the last eyelet was finished, I begged Dave to lace me into the corset. The picture is horribly unflattering, but here was the final result (Check out Captain Picard in the background):
It may not be as visible from the front, but from the back it's clear that after all my careful fitting, the darned thing is one size too small. Regency corsets are designed to have a wider gap in the back...but my gap was a few inches beyond the intended gap. You can also tell if you look at the shoulder straps which are cutting into my shoulders because they're too far forward. On a more positive note, at least you can tell that the corset is doing what it was intended to do.
Although my bust line was rather...frightening.
Resewing the seams to try and size the corset up isn't a great option. I had a very small seam allowance to begin with, and the corset really needs to go up an entire size. I have enough satin coutil to sew a second corset, but I'll need more cotton coutil. I'll reuse the busk and boning. I plan to raid my fabric supply and make sure I don't have enough coutil from an old project laying around, and if not I'll have to reorder.

Monday, February 12, 2007

Regency Corset

Wohoo! I'm actually sewing again. I'm making up my Regency Corset (the pattern to the right). I did a careful fitting with the Swedish Interfacing, but I must admit I'm concerned about the fit. Corsets are rather difficult to fit since you have to squeeze the back together very tightly to see how well it's going to fit. My Swedish interfacing would rip if I squeezed it like that...so I measured and measured again. All that's left is to cross your fingers. Here's the made up lining in cotton coutil:
Many people make bodiced petticoats to get the regency look, but that isn't an option with my figure. Instead, I need to make the full Regency corset, complete with gussets, boning, and a busk up the middle. I'm using the Mantua Maker pattern which according to everything I've read on line is supposed to be the best. I'm using cotton coutil for the lining and the outer layer is satin coutil. The bones are all steel (not period, but I'm not interested in using cord or reed, and plastic boning won't hold it's form so it seems like the best alternative).
Here is another photo of the lining to give you an idea of the corset's shape. Katherine, another historical seamstress, has also sewn a corset from this same pattern, so you can see her version here for an idea of the finished product.

Sunday, February 11, 2007

New Toys

My trip to India and Christmas have helped build up my sewing supplies a bit, and I'm off and running again!! Here are a few of my new toys:
Swedish interfacing. I think it's better described as sewable tracing paper. Basically, I trace my pattern piece, cut out the tracing paper, and sew up the tracing paper to test the fit of the garment. If it doesn't fit, I haven't cut out my pattern (once you cut it you can't change the sizes very easily) so I just trace a different size and start again. Here you can see me using the Swedish interfacing pieces to cut out the fabric (which had earlier been sewn together to test the fit and then taken apart).
Meet my evil twin: Mini. This is a Uniquely You fitting form. I've borrowed the picture from the Uniquely You website instead of mine due to vanity issues...that, and I haven't fitted mine yet. It's made out of squishy foam and comes with a cover that zips over the foam. You fit the cover tightly to your body shape, and then zip it over the foam to create a duplicate of your body shape. The great thing about this dress form is that it squishes...so I can lace up a corset over the form and get the right shape/measurements.

The only problem with the fitting form is that the cover needs to be fitted: once the cover is fitted, it squeezes the foam into your shape. Unfortunately the reason I need a fitting double is because I can't fit things on myself. Which is why I ordered a fitting double. Which I now can't use because it has to be fitted. Harrumph. I will probably need to call in my highly trained fitting expert on this one (aka Mom).

Friday, February 09, 2007

Fabric Surplus

Get ready!! The sewing projects are coming!!!

Thanks to my trip to India, I now have all kinds of fabric for new projects. I can't purchase any patterns until after Christmas since a couple are on my Christmas list, but here is what I have purchased:
This pretty purple/blue fabric will be made into a civil war visiting dress, and I got a contrast peach fabric. I need to find almost 100 yards of ribbon for trim (!!) before I can make up the outfit. I already have a pattern for this one - it's a Simplicity pattern (#4510) that I haven't made up yet. Check out pattern 3855 while you're there...it's brand new and looks interesting. The Simplicity patterns all seem to fit very well so I expect it will go together fairly smoothly (knock on wood). I was thinking this would be great with my civil war bonnet.
This simple white silk will be made into a Regency day dress. I'm going to keep it very simple, and later on will make an overdress so it isn't just the stark white dress. I've always loved the picture of Madame Recamier, and this should be a close approximation. Plus, I have a new Kashmir embroidered shawl to go with the final product - it's going to look so period!
Next, I got a silk sari that will be made into a Regency ball gown. I bought the other silk before I saw this sari. If I'd know I was going to find the perfect white ball gown fabric, I might have purchased a different color for the day dress, but oh well. :) I'll put the border along the hem of the dress and use the heavily embroidered portion of the sari for the bodice.
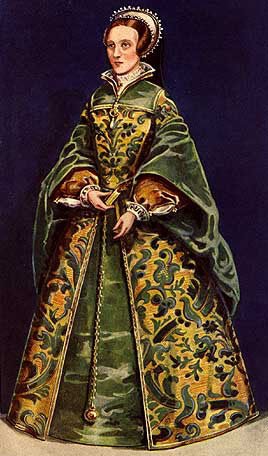
Projects currently on hold are: Star Wars Padme nightgown, modern ball gown for the marine ball, and my Tudor dress. The Padme pattern pieces are so large, I'm going to have to cut up the pattern pieces in order to cut the fabric and I got a little intimidated by this. Both the ball gown and the Tudor dress need a lot of fitting rework, and I can't do that until I get a fitting double. The Tudor dress pattern is pretty disastrous (the fit was all wrong) so I'm thinking of ordering a new pattern. This pattern from reconstructing history just came out and is based off of the patterns in the Tudor Tailor. These costumes look amazing, and I would love to try them out.

**Please note that due to issues with blogger I was unable to attach any pictures to this post for the last several months. The original blog was written before Christmas, and the blog content is somewhat out of date. The seamstress apologizes for the technical delays which have since been corrected with the newest version of blogger.

Saturday, November 04, 2006

Halloween: The Main Event

lIf you want to read about our Halloween events, please visit the Dave and Melissa blog. I'm mostly just posting pictures of all the little ghouls in their Halloween finery made by yours truly. little Sophie dressed as a Pea in the Pod...her costume was flannel wool, but she's been bundled up again...so she's the pink pea-in-the-pod. She looks pretty comfortable, wouldn't you say?

Nadia made a great belly dancer! She looks like she'll be able to grow into this costume over the next year as well.
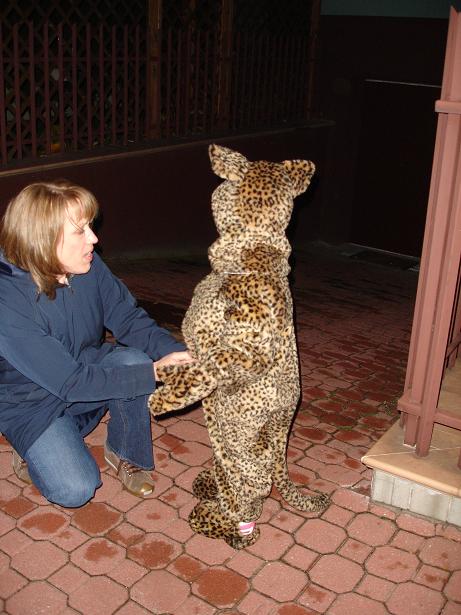
Lilly, my little cheetah, was not having a good night, so this is the best picture I could manage (you can't see, but she's actually sobbing here). I saw her at four different times during the evening, but she just wasn't a happy camper...Halloween was a bit overwhelming.
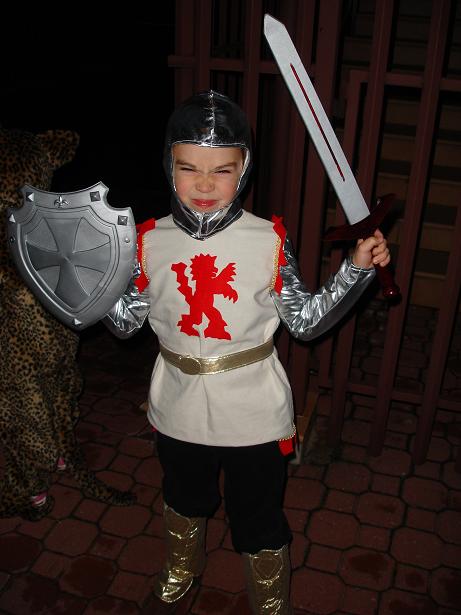
Lilly's older brother Adam had a fabulous time and really hammed it up for the camera. I really loved making this knight costume!
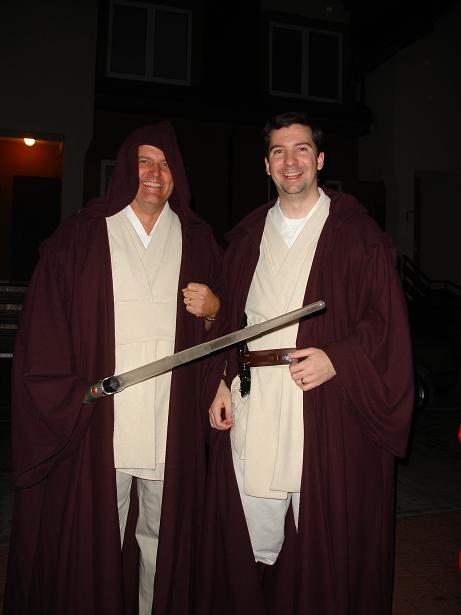
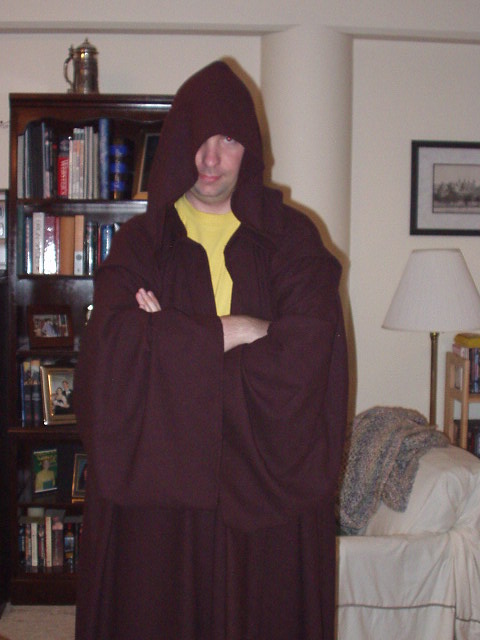
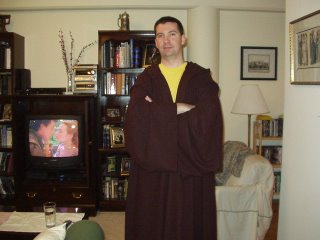
David and Dave, showing off their matching Jedi costumes. Dave needed a padawan braid to really make this pair costume go over the top, but oh well. There's always next year.

Tuesday, October 10, 2006

Halloween Countdown

Well, I haven't been posting too much lately because there has been a surprising amount of productivity. I am almost done with my Halloween orders for 2006 - this year I've made 2 complete Jedi costumes, a knight, a cheetah, a belly dance, and a pea-in-the-pod is still in progress. If I get all that done, I have the stuff for a Padme costume so I can match Dave. THEN it's on to my marine ball dress - the fabric is en route.

Here are some final product pictures (I promise to chase down the kids on Halloween to get cute pictures of them IN the costumes):

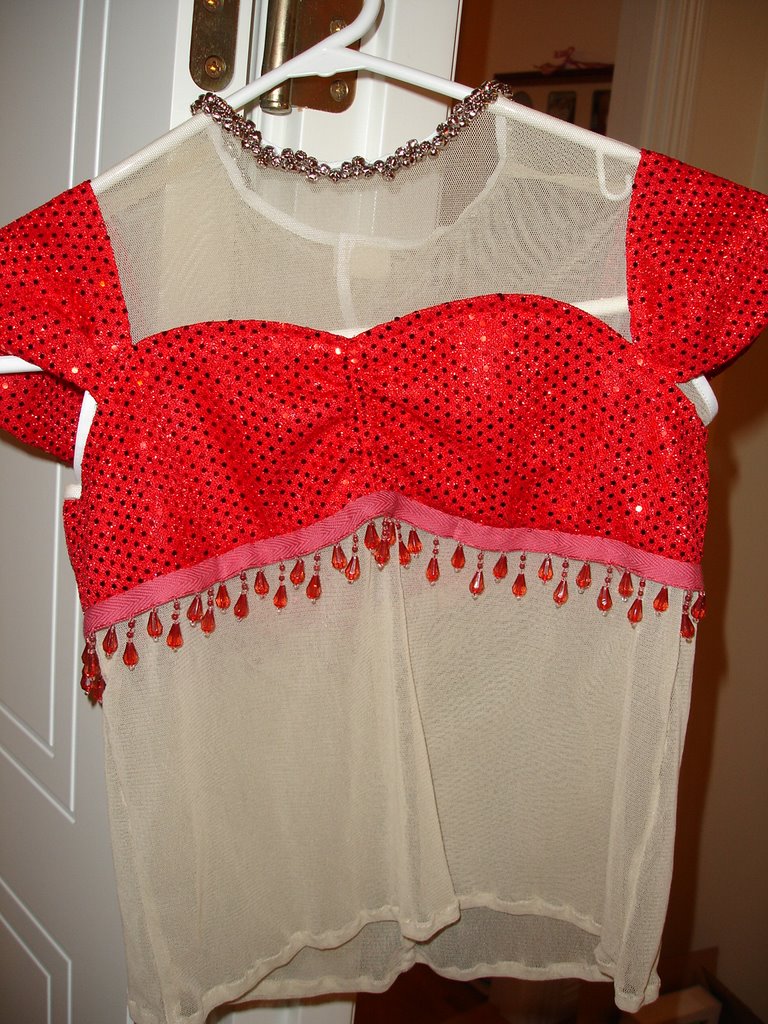
The belly dancer costume - I'm still working on the hat/veil. She also has a coin scarf to go with it. The close up shows the jingle bells I sewed into the neckline so the costume makes a bit more noise. I also love the beads around the bra top.
The top and the harem pants. I stuck on some little gemstones in the yoke of the pants. The mesh fabric on the top was a real bear to work with.
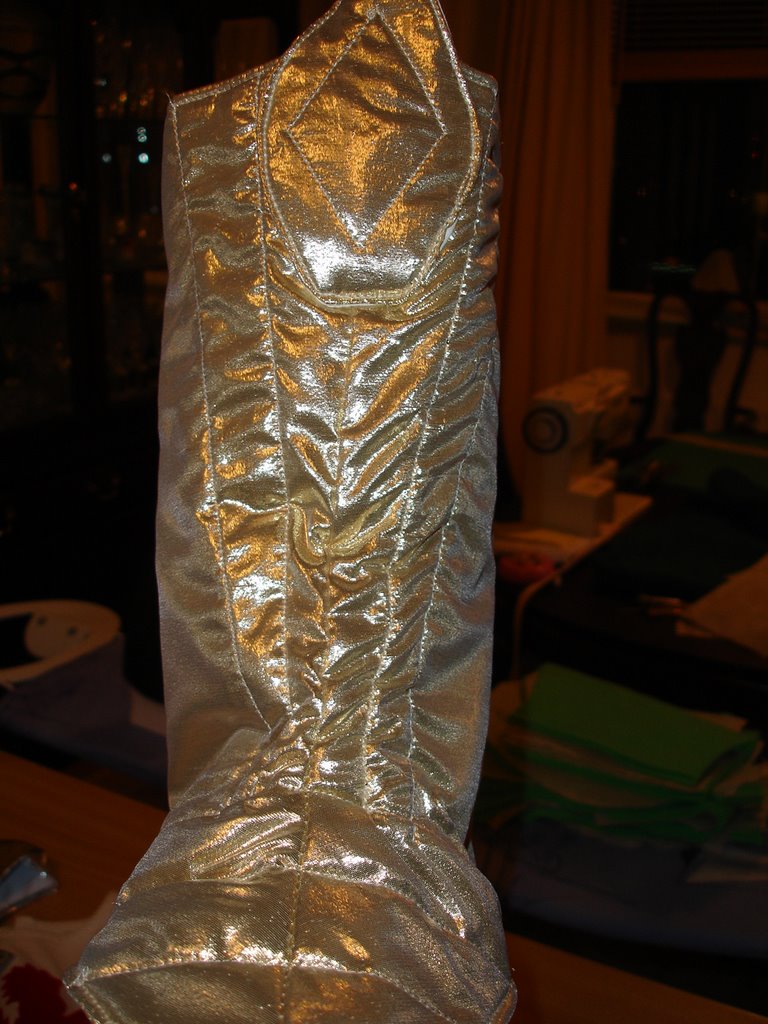
The knight costume - complete with silver stretch helmet! The costume is duck cotton, felt, and gold gimp for decoration. I really like the fusible interfacing that irons right on (that's how the lion was attached).
Here's a close-up of the "boots" - they're quilted gold lame and fit over sneakers.
Here's the rather impressive cheetah costume - it comes with shoe covers, mittens, and a hat (along with the jumper). I didn't get a good shot of the tail...but there is one!Different angle that shows off the fake fur. I thought the fake fur was going to be really horrible to work with. Other than making a bit of a mess when cutting, it wasn't any harder/easier to work with. It did get bulky at some seams, but you could just cut off the fur to make the fabric thinner.

Monday, September 18, 2006

Baby Blue Bonnet

If you have been following along on my other blog, you will know that I purchased a bonnet while I was home in the US. We made a special trip up to Gettysburg for the sole purpose of buying a bonnet. The first stop was a disappointment: it's reputed to be the best shop in town, but the owner looked down her nose at me and said I should only try on bonnets if I was 'serious about buying.' We drove 75 miles to look at bonnets, but apparently that wasn't 'serious' enough. After putting up with her evil eye every time I tried a bonnet on, we left empty handed.

I was about to give up when we came accross a brand new clothing store! The store only had two bonnets, but they were cheaper than the first stop, made of silk, and great little hand-sewn details. I fell in love with the blue spoon bonnet, and here it is:

I see a matching dress in the distant future (distant, because the Jane Austin dress is first).

Wednesday, September 13, 2006

Finished, This Jedi Robe Is

I really like Simplicity's new Star Wars pattern. I decided to make it out of Silk Noil (sometimes known as raw silk). There were times the silk was frustrating to work with, but this really only came up when I was trying to sew it to interfacing. The final result is great, and Dave has decided he wants one too. I've already ordered the fabric for him, and if time permits I might make a Padme costume I've had sitting around. It all depends on how much time I have left once my halloween commissions are in. Here is a picture of the entire Jedi costume:

Sunday, July 30, 2006

Jedi Robe II

You may or may not remember, but I have made a jedi cloak in the past. It was the same year attack of the clones came out, and the pattern companies still hadn't gotten their acts together in creating star wars costumes. As part of my Halloween business, I have received a commission to make a complete Jedi outfit. I had a snafu obtaining the silk I needed on eBay, and as a result I'm still waiting for the fabric to make the tunic. However, the cloak is done. It's Simplicity's new Star Wars pattern (#4450)based on several costumes from Revenge of the Sith (there's a Padme pattern that was cut from the movie...I don't understand why they marketed a dress that was not even included in the movie).
The cloak is made of flannel wool. The pattern was very easy, and went together quickly. I especially like the shoulder pleats. I tried to mimic this on the last cloak I made, but it was much more successful on this particular pair.
**A note on Fabric yardage - the pattern says you need 7 yards of 60 in. fabric. I got 8 yards of 45 in fabric. I had to refold the fabric the wide way, and managed to make this cloak out of less than 4 yds. Save yourself some money and order less fabric. I think Dave might get a cloak of his own this year....

Monday, June 19, 2006

Tudor Chemise

I officially declare this project finished. I ordered blackwork trim to sew around the edges (and I will sew it on), but I'm not making any more alterations.

This was by far the most infuriating project ever. If you don't recall from the previous post, none of the pieces were fitting together nicely, and then I discovered I'd cut the neck hole too big. Mind you, everything else about the chemise fits. But the square neckline in my size is so big it fell half way down my chest. What gives?I made a mock-up of the neck hole, and starting with a size 4, worked my way up. The size I finally chose was a whole five sizes smaller than the chemise I made. I took off the too-big-neck facing and then cut the smaller-size neck facing. Here's the mock-up: I ran two gathering stitches around the square neck and made it smaller to fit the facing. I had to repeat this process one more time (even though my mock-up was the right size, the pattern piece I cut was larger...I cut it from the same pattern size...again, WHAT GIVES??). Here's mock-up #2:The finished product fits, but the gathers pretty much ruin that nice square neckline. Harrumph. All the seams are finished so I might decide to wear it inside out with the neck facing visible. Inside out the facing lies flat and makes the chemise look more like it was meant to be.

Such a horrible experience. I had been contemplating making a Renaissance corset from this pattern, but after the problems with the chemise there is no way I'm going to dive into that mess. I have most of the fabric to start the Tudor dress (that the chemise is meant to go with), but again...I'm having a fitting issue, and I'm not sure I can solve it without a fitting double.

Wedding Dress Update

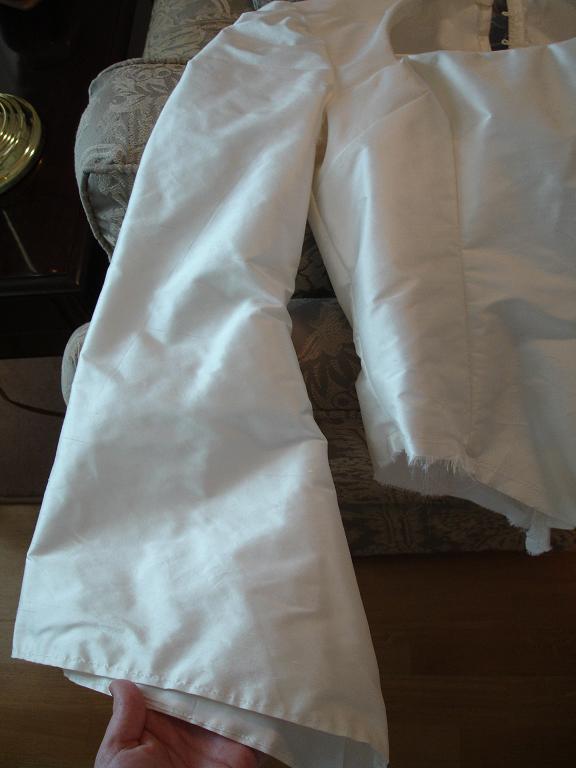
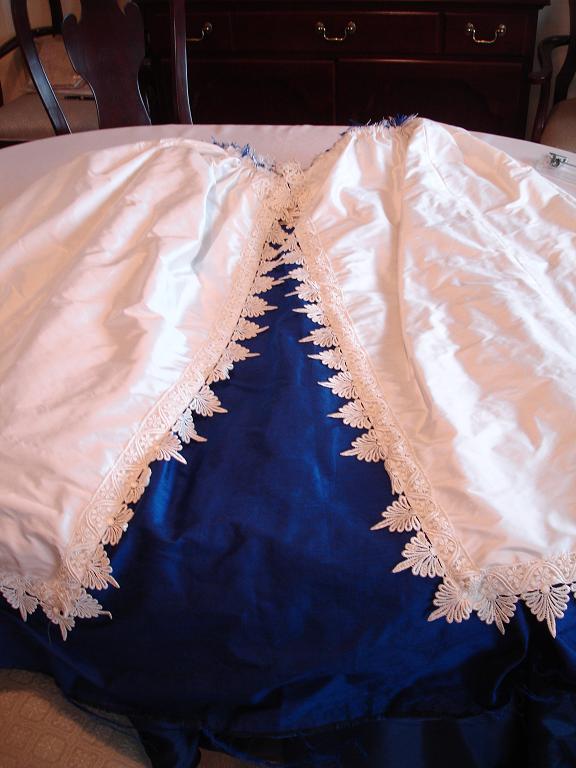
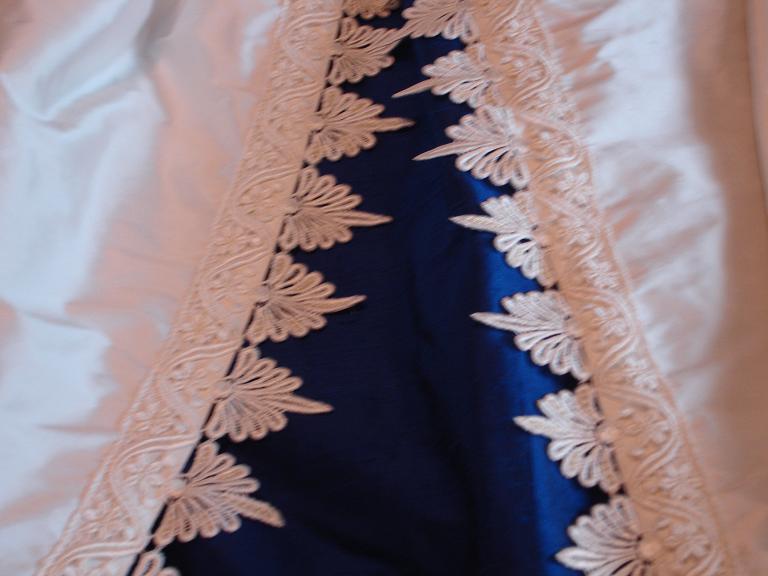
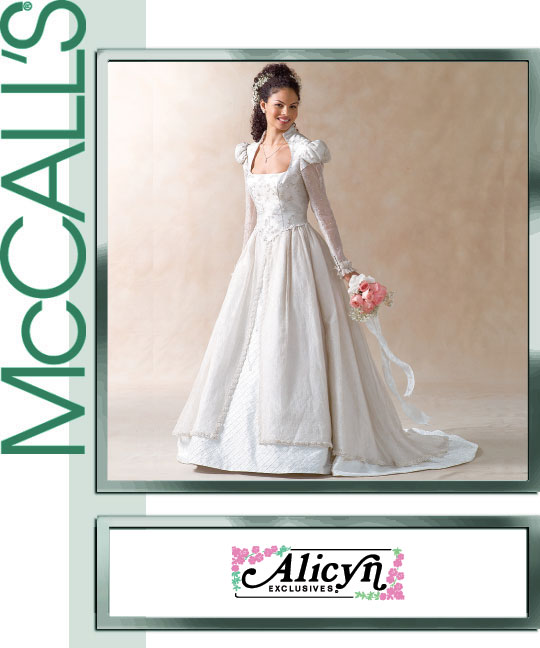
Many of you (by 'many', I mean my handful of faithful readers) have requested pictures of the "Dresszilla" wedding dress. I aim to please, so here are pictures of the dress to date:I took a close look at my seams and needlework, and I'm actually very pleased with the way the dress is coming together. Unique color and design choice aside, the fabric looks very nice and everything is coming together nicely. The dress is dupioni silk and is interlined with silk organza. We sewed on the freshly finished beaded lace this weekend:

The dress is supposed to fit in with the Bride's Renaissance wedding theme. Instead of a veil, her mother has made a matching blue Tudor French Hood with a white veil sewn on the back.

There's still some more lace to be sewn around the bodice. Then, I need to assemble the skirt and the bodice. I'm slightly nervous about this due to the weight of the 4 layer skirt. Originally there was only supposed to be three layers: lining, silk, sheer overskirt. Our version is lining, crisp silk, lining, crisp silk. It caused some issues when we gathered the skirt, and I'm expecting more issues when I assemble the skirt/bodice. My sewing consultant (aka Mom) suggested sewing in matching piping to reinforce the bodice edge if I have problems.

Wednesday, March 29, 2006

Future Projects!!

The wedding dress project has reminded me that I am a historical costumer, NOT a seamstress. And I'm just dying to get to a few of these projects:1. Finish the Tudor dress - I plan to surmount the neck opening that was made five sizes too big! I will start by taking out the square neck facing, gathering the cut square until the opening is smaller and fits, then cut a new smaller neck facing. It might not make a whole lot of sense, but I think it will work. I still have a horrible impulse to make up a renaissance corset...I have some silk taffeta left over from my Robe Francaise...
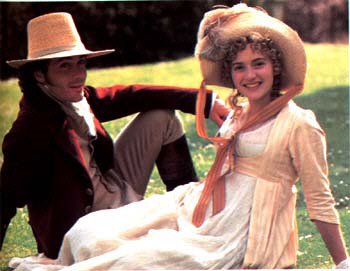
2. A Regency Gown, overgown, undergarments and corset. Why, you may ask? Especially, as even I am willing to point out, the empire style is not particularly flattering or forgivng for us curvy ladies. I can't explain it, but Jane Austin has won, and I MUST have one.
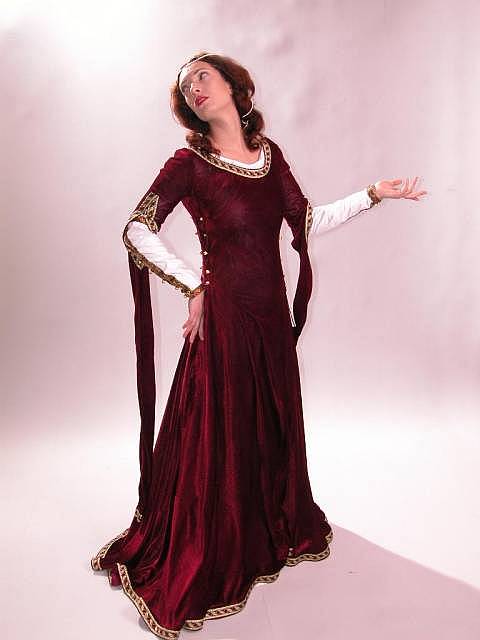
3. A medieval gown for the Malbork Siege in June. Dave and I are planning on attending, and I want to go in costume. I have a horrible confession to make - I want to BUY this dress. I don't know very much about the medieval period, and am not very impressed by the patterns I've seen. Plus, I fell in love with a gorgeous gown and petticoat on ebay. Maybe with birthday money...it wouldn't be much cheaper for me to make it myself.
4. A long time ago, in a galaxy far far away. For those of you that don't know, I adore the costume designs from the new Star Wars movies. I have my brand, spaking-new, version of Dressing a Galaxy which has great close up shots of the costumes and fabric. And then JoAnns went and had a 99 cent pattern sale AND a sale on bridal satin. So I actually have the fabric and pattern for Padme's nightie. With all those zippers and beads, I can guarantee I'll never sleep in it.

Thy name is Dresszilla

I actually HAVE been sewing. I needed a bit of a break after my tudor chemise problems (side note: I think I have surmised a good way to salvage the chemise). I had volunteered to help my neighbor make her daughter's wedding dress. I know: I'm certifiably insane.

I have to admit, I don't think I'm ever going to do a wedding dress again. It's complicated, high stress and expensive if something goes wrong, and you have to manage expectations. It's hard trying to convey to people that even though I can sew, I am not a trained seamstress or pattern drafter. I need a pattern to follow, and I want to stick to it. Instead, people always assume you can "just change the sleeves," or "do a different collar," or worse yet, "just whip something up."
Anyway, all that stuff aside, the dress IS coming together nicely. The girl I'm making it for is in town, we've done a few fittings, and everything seems to be fitting. The dress is pictured above. We did actually use a different pattern for the sleeves - a medieval bell cut. The underskirt is almost a navy blue (not my choice, but it's her wedding dress). The overskirt, instead of being transparent, is white dupioni.

Sunday, February 05, 2006

Tudor Chemise

Sigh. This pattern has not been going together as smoothly as it should.

Before I start to rant and rave, let me first say that the pattern pieces fit together very nicely, the pattern itself is very nice. Everything that I have finished looks very beautiful and historically accurate.

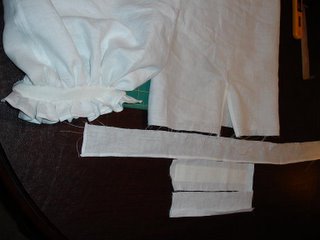
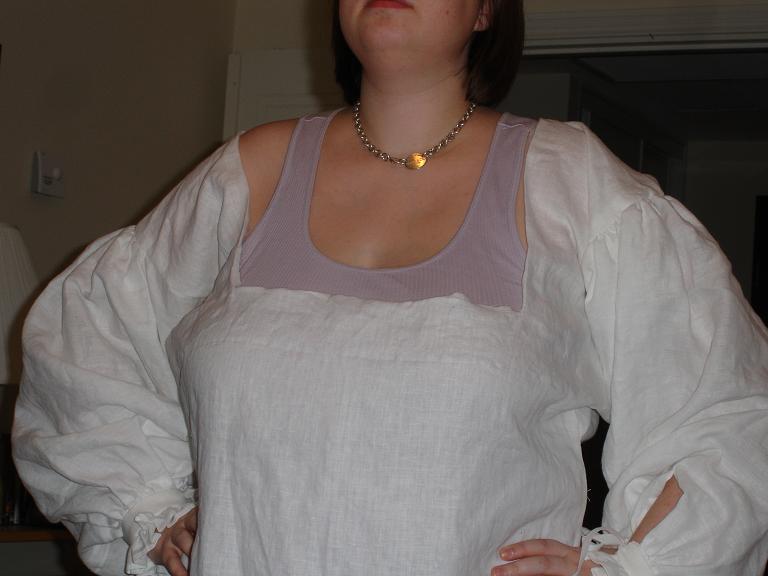
My problem with the pattern is the instructions. They have caused several moments of extreme sewing frustration. Examples: pattern pieces in the instructions that don't actually exist; instructions to cut the incorrect number of pattern pieces; interfacing that pops up in the instructions, but which I have not been instructed to cut out; complete lack of cuff assembly directions/illustrations. All this meant that the cuffs that should have taken an hour to assemble took me about 8 hours to complete. After FINALLY finishing the cuffs, I tried to insert the sleeves into the garment. The instructions said "match dots and then gather the sleeve to fit." So, I match the dots...and the dots lined up exactly...there was nothing to gather, because there was no extra fabric. What the **%@? AAARRGHH! I set it aside. I've had enough for today.

I'm concerned that the neck square may be too big. That's not the pattern's fault...it's mine for being too impatient to make a mock-up. The pattern even suggests it so you get the square sized correctly. I just didn't read that part until AFTER I'd cut out the pattern. Oops. Hopefully once I'm corseted it should fit with everything pushed up.

I have enough linen left to make a partlet, so that may be my next project. I'm still very tempted to make the corset...but these instructions have put me off. Maybe I should sign up for the pattern designer's yahoo account and see if others have had the same problems I have.

Saturday, January 21, 2006

After the Long Break…

I give you the plans for my Tudor undergarments! I now have all the velvet I need to make my Tudor gown, and before I order the brocade I need, it’s officially time to start my undergarments.

I’ve won another gift certificate to www.denverfabrics.com. They stopped doing the drawings for certificates recently…maybe because people like me kept winning over and over again. I ordered some beautiful white handkerchief linen.

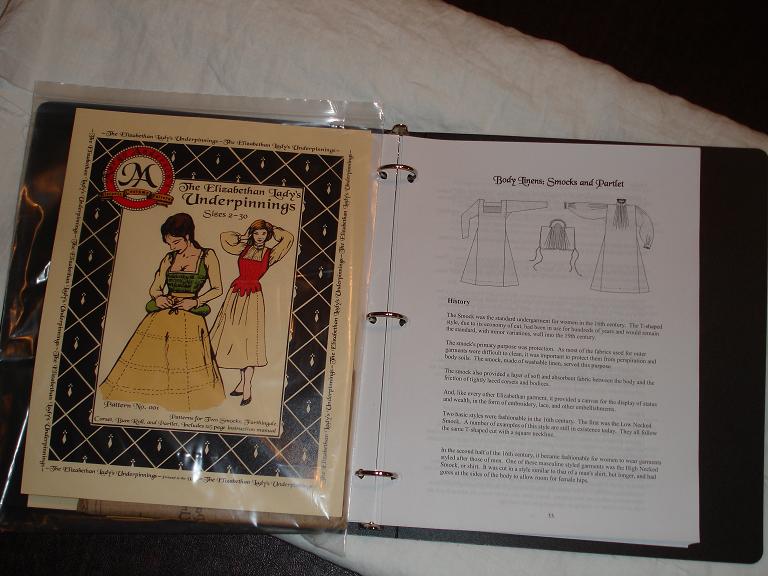
I was actually almost ready to start cutting out the chemise pattern my mom brought me from the States. However, once I cracked into the instructions, I realized this wasn’t the kind of chemise I wanted, changed my mind, and ordered the Margo Anderson shift pattern.

An added bonus of this pattern is it comes with several other undergarments, including a great corset pattern. I may or may not make up a version of it. Everyone that uses this pattern seems to rave about it. I could make do with my 18th century corset, but it doesn’t quite look right either.

Before I make it, I need to read a bit more about the corset. I’m not sure it will give me the nice conical Tudor shape. Kendra of démodé made this great version of the pattern.

Sunday, November 20, 2005

Oodles of Fabric!

Hi all,

I haven't posted lately because I have been sadly without fabric. However, that is slowly changing! There is TONS of fabric on my Christmas list. I also WON fabric from Denver Fabrics online. I'm not kidding: you can check it out right here (I'm listed as Melissa of Dulles). With my $50 dollar gift certificate, I ordered red and black velvet for my Tudor gown. This is a change in plans, because I originally wanted an all-brocade gown. The gift certificate changed my mind. The red velvet will make up the body of the gown, and the black velvet is for the turned-back undersleeves. I still need to get some gold brocade for the sleeves and underskirt, and some linen for a chemise. Then I can start sewing!!

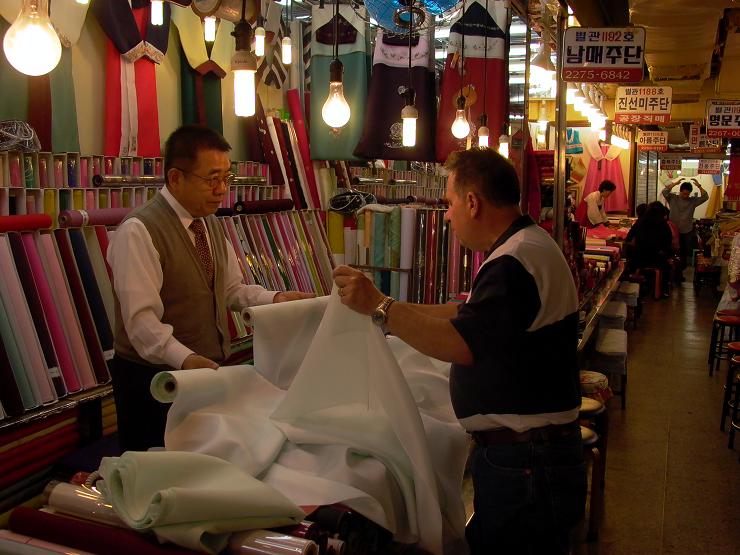
My father-in-law also made a recent trip to Korea, and bought some silk for me!! World's coolest father-in-law!!! I haven't actually seen the silk yet, but he sent me this picture (look at all that silk!!! It makes me drool!).
The silk is a very pale blue (even though it looks white in the picture). Look at the vendor's hand showing through the silk: it looks almost sheer!! Wohoo!! I'll have to come up with something creative for the silk. It's not as wide as U.S. fabric: probably about 22 inches versus the standard 45 inches. It will require a bit of research and some creative cutting. I can't wait!