Sunday, December 19, 2004

Completed Jedi Robe


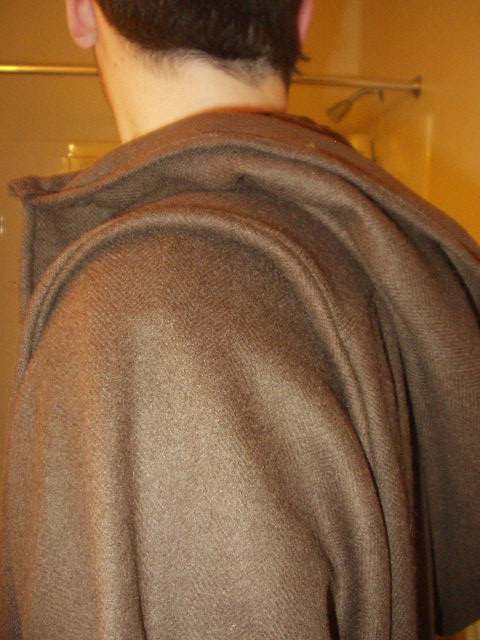
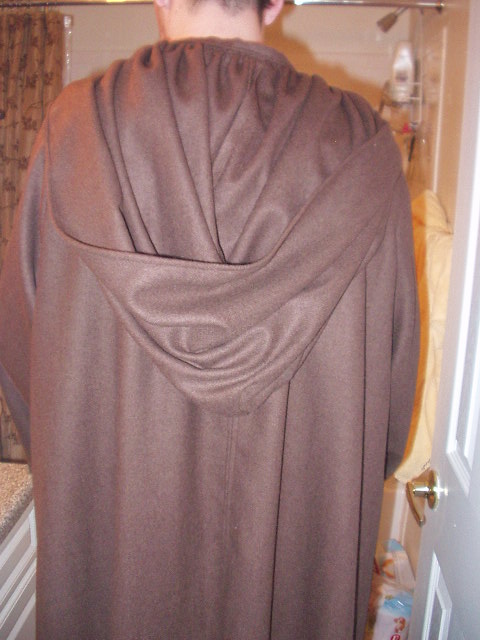
Thanks to my husband for posing!


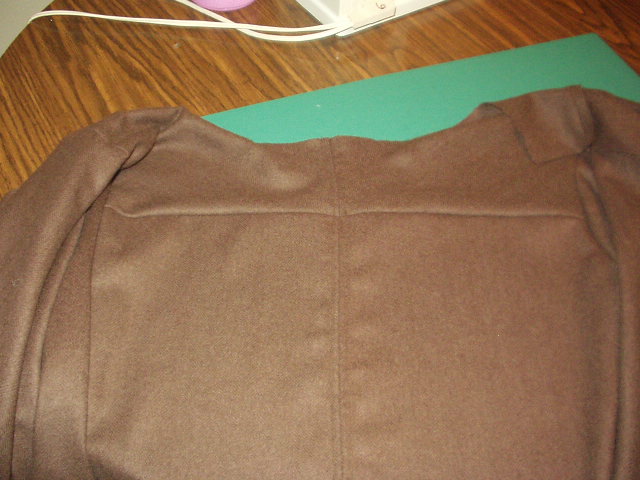
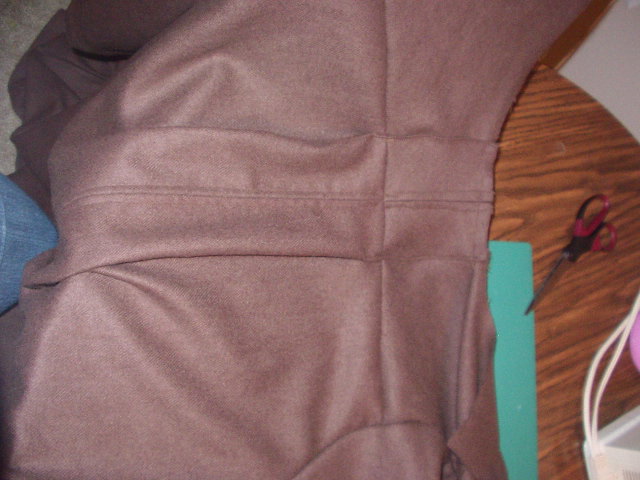
The Jedi Cloak is all finished, and ready to ship out. I finished the last of the seams today, and hemmed it up. I finally decided to go ahead and add a pleat to the shoulder area. I think the end result really looks nice, and the large spacious hood is exactly what I would expect to find in the Star Wars costume room. At a futur date, my friend might look into the matching tunics to make a complete Jedi costume (out of silk noil!), but for now, this wraps up my jaunt into Star Wars sewing.

I'm going to wait until after Christmas (to see if I have any new patterns or fabric funds) before deciding what my next project should be.

Saturday, December 11, 2004

Jedi Robe: Change the Sleeves, or not???


Sleeve with a nice tuck/pleatPosted by Hello


The unaltered sleeves

The final decision that I need to make on the cloak is whether or not I would like to alter the sleeves. The top picture shows the nice drape that results from a small pleat make right at the shoulder of the garment. The bottom picture is the sleeves as they look right now. I need advise. Which do you guys think looks better??? Again, if you need to see the real cloak, click here.

After this, I just need to finish a few more seams that are still raw, and hem the bottom to the correct legnth. That should be interesting since this is a gift, and that certain someone doesn't live in the area. A lot of careful measuring will be called for. Posted by Hello

Jedi Robe: New Hood


The next step was altering the hood. I really disliked the way the hood on the pattern came to a point in the back. It looked a bit moroccan, but it wasn't what I was going for. I first tried to round out the pattern peice that came with the Simplicity pattern, but the hood wasn't big enough, and it still seemed to come to a point. I also didn't care for the seam placement or the pleats it used.

Instead of messing with the old pattern, I decided to make an entirely new hood. The Padawan's Guide had great directions that I was able to follow. The result was the second picture: it's larger, rounder, and falls the way it should in the back. The hood began as a large rectangle, and was gathered onto the neckline to the make the hood. On the front, the hood will even fold over a bit over the shoulders which is exactly what they did in the movies.

Jedi Robe: Altering the pattern


Posted by Hello


The gorgeous camel wool fabric for the Jedi Robes arrived this week, and the project is well under way. As a Simplicity costume pattern, it was very easy and quick to assemble. However, there were several alterations I wanted to make to the pattern to make the finished product nicer. Today, I started with the back of the robe. I noticed that the cloak was lying very flat, and wasn't draping as nicely as it could with such a nice wool. So, I added to pleats at the neckline in the back, which now helps the drape in the back. Posted by Hello

Saturday, November 20, 2004

Anna's Fabulous Silk Bustle Dress!!!


In a last ditch effort to finish the dress before Anna left town, we got together last night and finished sewing the bustle and bodice of a dress I've been helping her with. You can see several steps of the dress at her evil laboratory.

After we took this picture, we even added pleating to the edge of the underskirt. There's a little bit more trim that Anna can take home to finish on her own, but she has a completely wearable bustle gown. We were both very proud of the fit!! The bodice especially goes on like a glove, and doesn't pull anywhere! The triumph of the muslin strikes again! Posted by Hello

Tuesday, November 16, 2004

Completed Civil War ballgown!!!


Completed!!!

Okay...the dress needs a little bit of ironing (and I may go back and do a bit more trim), but it's done.

I have to admit that it's pretty much as uncomfortable to wear as it looks (good lord, how did women dress in these things???). So let's see...underneath the dress, I'm wearing a chemise underneath my corset so the corset doesn't rub my skin, my hoops, a petticoat, and then the heavy lined and boned dress. There's even a little bit of padding in the bodice so you can't see my corset line. I had on so many layers that I was sweating after five minutes, and couldn't quite manage to lift my arms up. I think a comfortable day dress (cotton!!! And not 18 yards of fabric!!) is moving up on my wish list.

It is pretty, though, isn't it? And it does fulfill that girlhood dream of a HUGE dress. Posted by Hello

Monday, November 15, 2004

Completed bodice!!!


Hey all (or the few regulars who read my page!!) :)

Did LOTS of sewing this weekend. Most of it was helping out Anna with her to-die-for silk bustle dress. Visit her evil laboratory to see pictures of the finished skirt and apron. We have a picture with her also pined into her bodice. All that remains is the bustle.

I also got a chance to do lots of handsewing on the bertha. I finished applying the bias tape, sewed on the trim, and then handstiched the next of the bertha to the neck of the bodice. And voila!!! A finished bodice. I'm going to add a privacy panel in the back, sew hooks to the top of the skirt (to keep it from seperating from the bodice) and hem the skirt. Then, I'll be able to mark this gown as complete! Posted by Hello

Sunday, November 07, 2004

Projects Moving Forward!

Hey All,

Just wanted to drop a line and let you know that I am still working on my c0stumes. I'm currently hand sewing on bias tape to the bertha for the Civil War ball gown, making fabric choices with Lauren for her Jedi Robe, and helping Anna with her fabulous bustle gown! If you haven't, you should all go see how her dress is progressing at her evil laboratory. We made all kinds of progress this weekend by fitting her in a muslin of the bodice and cutting out the entire dress (and of course, we went to the fabric store!!! muhuhuwaaaah!!). I had some pictures from cutting out the silk, but I didn't want to steal her thunder, so go look at her website for pictures!

One minor nuisance: I decided to take advantage of G Street Fabrics' 50% off pattern sale to buy the jedi robe pattern...and grr...they were sold out. What's the deal? A week after halloween and suddenly the costume patterns are gone??

Tuesday, November 02, 2004

Next Project: Jedi Knight Robes!


Yay!!! Upcoming project!!! My friend Lauren and her boyfriend Jeff have asked if I can make them reproduction Jedi Knight oufits from the new Star Wars movies. Since there's nothing I love more then sewing on someone else's budget, I of course said yes. :)

We'll start off by making the robe (or cloak) since it's the most expensive part of the costume. The Jedi Padawan website has a lot of great information on how to make Jedi costumes. I've already done a lot of research, and have decided to go with the Simplicity pattern pictured above. I'm be making view A (it's the one that's shown in the bright blue) but I'll alter the sleeves to make them more full, and change the hood from a point to a rounder shape with no seam down the middle.

Lauren and I have already begun to scour the online fabric stores and are considering different types of wool that might do well for this project. So far, this fabric is the leading contender. I'm failry sure the rest of the outfit will wind up being out of a nice linen of some sort unless I can find some really cheap homespun.

Sunday, October 31, 2004

My Husband the Vampire


Haven't had much time to sew lately...Polish class has been taking up lots of my time. However, I did want to show a picture of our halloween costume. Dave dressed up in my black cloak and had a killer new set of vampire teeth. I think I want to go get a pair too...don't they look good? I went as his victim...but of course didn't get a good picture. We had a great time. Happy Halloween!!! Posted by Hello

Monday, October 18, 2004

Applying the Bertha


Tonight I pleated and assembled the bertha for the neckline of the bodice. I have a picture of it pinned onto the bodice (I was making sure the pleats were straight), but it's not actually attached to the bodice yet. I have to tack the pleats into place, apply bias tape along the bottom raw edge, add the white pearl trim to the bottom edge, and then finally attach it to the bodice. Still, we're definitely into the home stretch. Everything from here out is just finished up the details.Posted by Hello

Sunday, October 17, 2004

Finished sleeves


I finished up the sleeves this weekend, so they are now entirely done and sewn into the bodice. The organza really does make beautiful puffed sleeves. I'm thinking about using my leftover organza to add a gather rim along the top edge of the bodice. I'm just not certain I have enough: I would love a very gathered, almost pleated, look.

The last steps on the bodice will be the bertha, and then finally adding a privacy panel in the back (it will give a bit more fudge room on the size when I'm lacing it up. After that, the bodice is 100% done. Posted by Hello

Friday, October 15, 2004

The Scientific world of Sleeve "Poofs"


Alright! Now that my mother has unraveled the world of sewing with organza, the sleeves are moving forward. It takes a bit longer then sewing with another fabric because I have to take the time to go back over every seam and rip away the tissue paper I used as a stabilizer. Also, since Organza has a tendency to ravel, I'm using French seams. A french seam is a bit complicated to explain, but easy to do. It's basically a seam enclosed on itself to prevent raveling.

Wednesday, October 13, 2004

Robe Anglaise


AAaaaah! Someone save me from myself. If I had a million dollars...

JP Ryan, the master of 18th century clothing, has just come out with a new pattern! It's for a Robe Anglaise...a gown very popular toward the end of the 18th century. It has teeny tiny little cartridge pleats along the back, and instead of wearing side hoops, you wear a small bum roll. You can check out the pattern at this link:

http://www.jpryan.com/details/anglaise.html

I like view B. I haven't bought the pattern, and have no plans to in the near future (too many other things I would like to sew first), but ooooohh!! Maybe someday...

This is definitely on my wish list. Posted by Hello

Monday, October 11, 2004

Bodice underway


Wow Sewing weekends are FUN!!

Before every one gets too impressed with the progress: I cheated here a bit. I actually started making the bodice months ago, and had it assembled for the most part (even the boning was already hand sewn in). What I did this weekend was hand stick on bias tape to finish the edges, and then I put on the sleeve caps.

The sleeves themselves are going to be poofy and made from silk organza. This is the first time I've worked with organza, and it's so fragile that I kept catching it in my sewing machine. Stumped, my mother came to the rescue and told me that I need to go get some tissue paper to place underneath and reinforce the organza while I sew. :) So, I'll need to hunt down some tissue paper that I can use (I suppose I could use pattern peices from sizes I'll never use).

Until next time, cheers!Posted by Hello

Sunday, October 10, 2004

Look!! It's an ENORMOUS skirt!


Ladies and Gentlemen...we have a skirt!!!

Ok, it's not hemmed, and as you can see by the hand clutching the back, I haven't sewed on the hook and eyes yet, but it's a SKIRT. Don't worry about the lace that seems to have folded itself up on the side...it's there, matching the other overskirt panels. I just need to iron it back down. I was very proud of my cartridge pleats (they make that huge poof in the back), but my pictures came out kinda funny, so I'll save that for another day.

Posted by Hello

Friday, October 08, 2004

And Sew it Goes!


Now that I am free of the bias tape chains, I have made HUGE progress. I've applied all the bias tape that needed to be sewed to the skirt, and sewed together the pieces of the overskirt. I've draped the overskirt over the underskirt so that you can get an idea of what it will look like when it's finished.

The next step is a few pleats that need to be sewn into the overskirt, and then I'll attach the overskirt to the underskirt (this might SOUND easy, but it's going to involve lots of gather, knife pleating, and cartridge pleats). I'm excited/nervous about the cartridge pleats. They're teeny, and supposed take a lot of skill/patience. Posted by Hello

Thursday, October 07, 2004

Hours and Hours later...


Ta DA!!!

Hours of TV viewing later (with the ironing board set up in front of the sofa) I have yards and yards of luscious yellow satin bias tape. And yes, the cat really did HAVE to be in the picture. I'm telling you, the moment she claws at the satin, I'm gonna be one step closer to my Tudor gown with fur sleeves. (but seriously, she really IS cute, isn't she?).

Tomorrow I'm running to the fabric store to get yellow thread, and then I'll start sewing on the bias tape to the skirt pieces. Gotta love Friday's! Posted by Hello

Tuesday, October 05, 2004

The Bias Tape Blues


Yard and Yards complete...
Posted by Hello


Only a few more dozen to go.

Okay, you want to talk about a project that would drive you nuts?? Well, after very carefully marking out the satin on the bias so I could cut it and turn it into bias tape, I messed something up because the silly lines didn't match up at all! So instead, I grabbed the pattern 'guide' piece, and just kept using it over and over again to cut the bias tape without the markings. Took forever, but voila! Hopefully some 33 yards of bias tape.

Hard part done! Now all I have to do is Iron it all into the correct shape (the above picture is what it will look like when its done). I'm very happy with the way this is turning out, and I think the satin and taffeta (and even the color combo) might turn out much nicer then I had originally thought.

Until next time, I remain ever your seamstress, buried under mountains of Satin. There are worse ways to go!

Monday, October 04, 2004

Ball Gown: Overskirt


It's been a while since my last post...'real' life has been getting in the way of sewing.

Here are the peices of the overskirt with the lace attached: the light shows the true color of the taffeta. The overskirt is taking a while because I had to hem part of the skirt peices, iron up the rest, and then attach the lace to the edges.

I've marked off the fabric for the bias tape, and my next project is sewing it together, and then cutting the tube into 33 yards of bias tape. It'll take forever, but there's nothing more I can do on the dress until that's done. In case I haven't mentioned this before, this dress is by far the most complicated and time consuming project I've ever undertaken. I would have thought that a fancy set of 18th century stays would have required more skill, but I'm am being proven wrong. Still, I love working with this gorgeous fabric, and the gown is going to be stunning when it's completed!!! (I also have a sneaky suspicion that it's going to take up more then its fair share of a room) Posted by Hello

Sunday, September 26, 2004

Another yard bites the dust!


More progress! The ruffles are finally all sewn to the underskirt!

To give you an idea of how much fabric I was working with, I've attached a picture of me and the sewing machine, almost lost in a bundle of taffeta. Technically the next step was to make 33 yards of binding tape for the raw edges of the ruffles, but after the battle with the ruffles, I didn't have the heart to start it. I'm also not so sure I like the color I chose for the binding: I bought a yellow satin, thinking the green and yellow might complement each other. But...I'm using cream lace trim as well (cream and yellow...I'm not convinced it works). Instead, I decided to move on to preparing the overskirt and sewing the lace edging to the pattern pieces.

Also, my friend Willow came over this weekend and last weekend to work on her halloween project. I love having friends that I can talk into doing things with me!! We just finished her corset (is it wrong that I want to make one like hers?), bloomers, and a bustle pad. She looks great, and we're looking at fabric selections for her dress! Check out her outfit: we're using laughing moon's corset and undergarments patterns, and the new simplicity bustle dress pattern.

http://www.snapjudgments.blogspot.comPosted by Hello

Thursday, September 23, 2004

Ball Gown: Ruffles Galore


Progress Report: Ruffles Galore!
It's official - I've picked up the green taffeta civil war ball gown that was set aside for a few months. I decided that it would be best to hurry up and get the annoying ruffles pinned onto the skirt and have it over with. So, I sat down in front of the TV for a few hours, pulled in my gathering stiches (remember...each ruffle is 20 feet long) and pinned them to the underskirt. Tomorrow I'll go ahead and sew them down, but the diffucult part is accomplished! I can only hope that the worst is behind me...but then again I've never attempted cartridge pleats, and they're looming on the horizon. Next, I believe I assemble the overskirt, trim the overskirt, and then sew the overskirt and underskirt together.
Posted by Hello

Tuesday, September 21, 2004

Future Project: Tudor gown


This is definitely far off in the future (too many patterns waiting in my closet to be made into dresses)...but I would love to make a Tudor gown someday. Supposedly this portrait is of Jane Gray, and her gown is typical of the later Tudor years. I think I would like a different collar, and would want to use these period patterns:

http://www.mediaevalmisc.com/pp51-53.htm
http://www.mediaevalmisc.com/pp52.htm

I would probably want either a brocade, velvet, or combination. Maybe I could even go to a flea market and buy an old fur coat so that I could have real fur sleeves - it would probably be cheaper then buying faux fur at the fabric store. I can't decide if I would want a Gabled Hood (boxy shape) or a French hood (rounded)...I guess it depends on if I want early or late Tudor (these hoods came in and out of style as often as King Henry's six wives) Posted by Hello